Nestled along the silent, forgotten western fringe of Liurnia of the Lakes, the Road's End Catacombs stands as a testament to the Lands Between's hidden perils and promises. This seemingly unassuming dungeon, a mere speck on the vast map, holds within its shadowy depths a labyrinth of deception guarded by spectral foes. For the intrepid Tarnished who dares to venture into its heart, the catacombs offer not just a trial of combat, but a puzzle of perception, where walls are not always what they seem and true paths are concealed from plain sight. The rewards, however, are worthy of the trial: powerful Spirit Ashes and a formidable Strength-based armament await those who can navigate its illusory halls and overcome its ethereal guardian.
Charting the Course to the Catacombs
Pinpointing the dungeon on the map is the easy part; the journey there is a subtle test of navigation. The entrance lies just west of the Converted Tower, but the direct route is a mirage. The wise traveler begins by heading north from the tower's site of grace, choosing the eastern fork that skirts below the minor Erdtree's hill rather than the path leading directly toward it. After cresting the hill, one must leave the beaten path entirely, veering westward. A crucial landmark is the Revenger's Shack; if its somber silhouette comes into view, you've ventured too far north.
The true path is a discreet trail that runs along the absolute western edge of the map, tucked beneath the shadow of the minor Erdtree hill. Following this southern trail, past the unsettling shrieks of perched Giant Bats, will eventually lead to a crevice in the mountainside—the unassuming mouth of the Road's End Catacombs.
Delving into the Deceptive Depths
The descent begins from the Site of Grace, a plunge into near-total darkness where a light source is not a convenience but a necessity. A lantern or a steady torch is crucial to pierce the gloom and spot the dungeon's primary inhabitants: the cunning, stone-skinned Imps. These foes relish ambush, leaping from shadows with terrifying glee. The first such assault comes swiftly at an initial corner, a brutal welcome committee. After dispatching this aggressor and claiming a Grave Violet, the path forward seems clear.
The next chamber holds another lurking Imp, hiding just beyond the doorway. Beyond it, however, is a promising sight: the dungeon lever. Pulling this mechanism echoes with the satisfying clunk of a heavy door unlocking somewhere in the depths—a goal now set, but a path still shrouded in mystery. From here, the exploration delves downward:
-
First Descent: Collect Grave Glovewort [2] and two Grave Glovewort [3] on the lower floor.
-
Second Descent: Defeat an Imp hurling projectiles from below.
The following hallway is a gauntlet. An Imp hides in a left-side alcove, while a deadly pressure plate trap waits at the intersection. Triggering it unleashes a volley of arrows from down the hall. Caution and swift elimination of the hidden foe are key. Looting the alcove yields another Grave Glovewort [2].
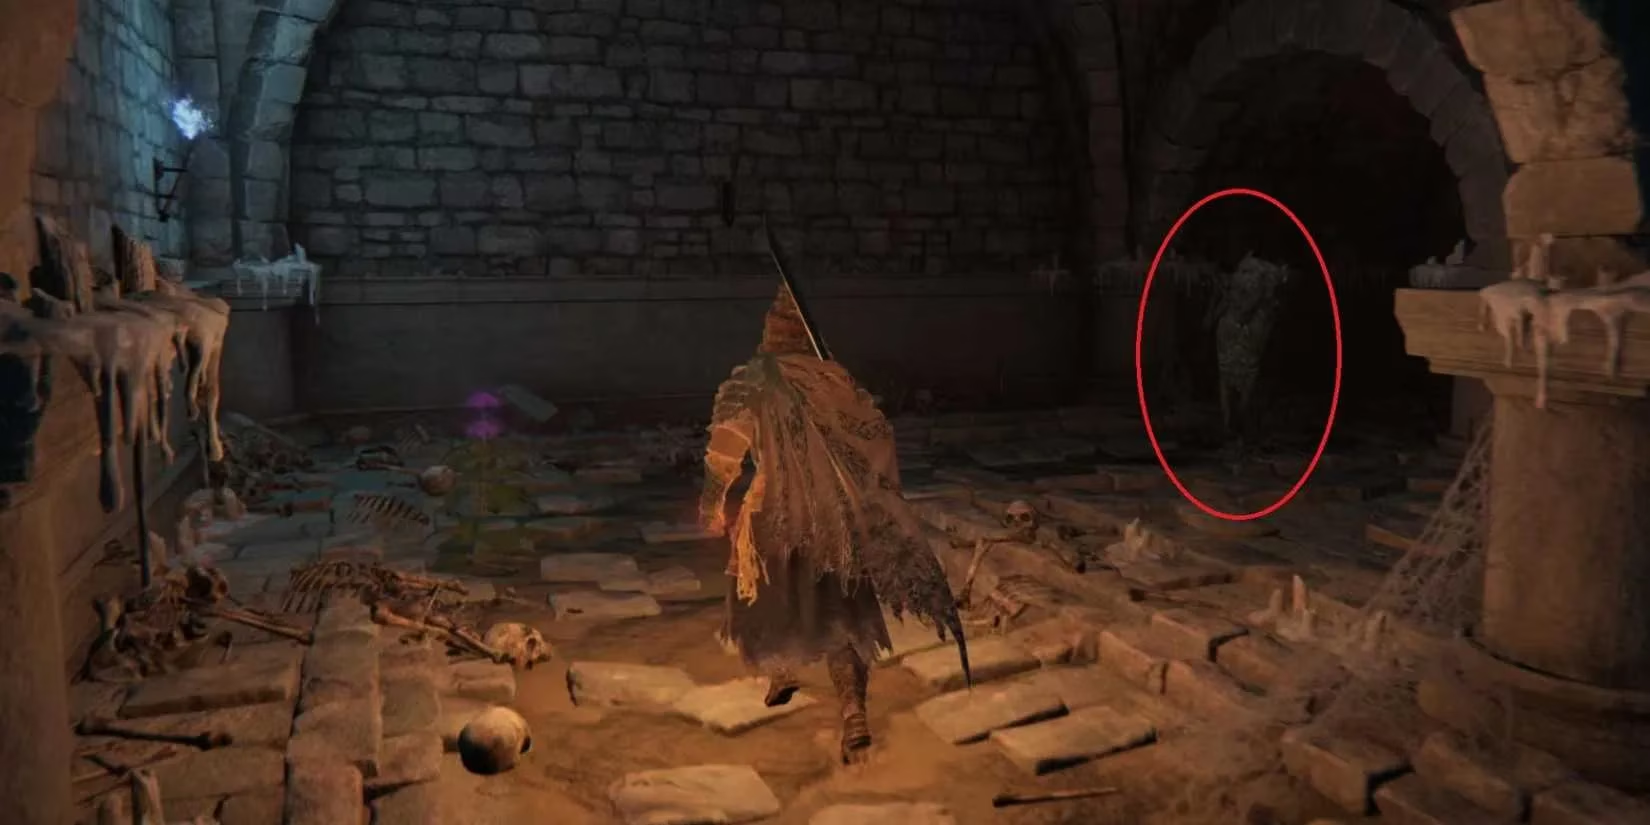
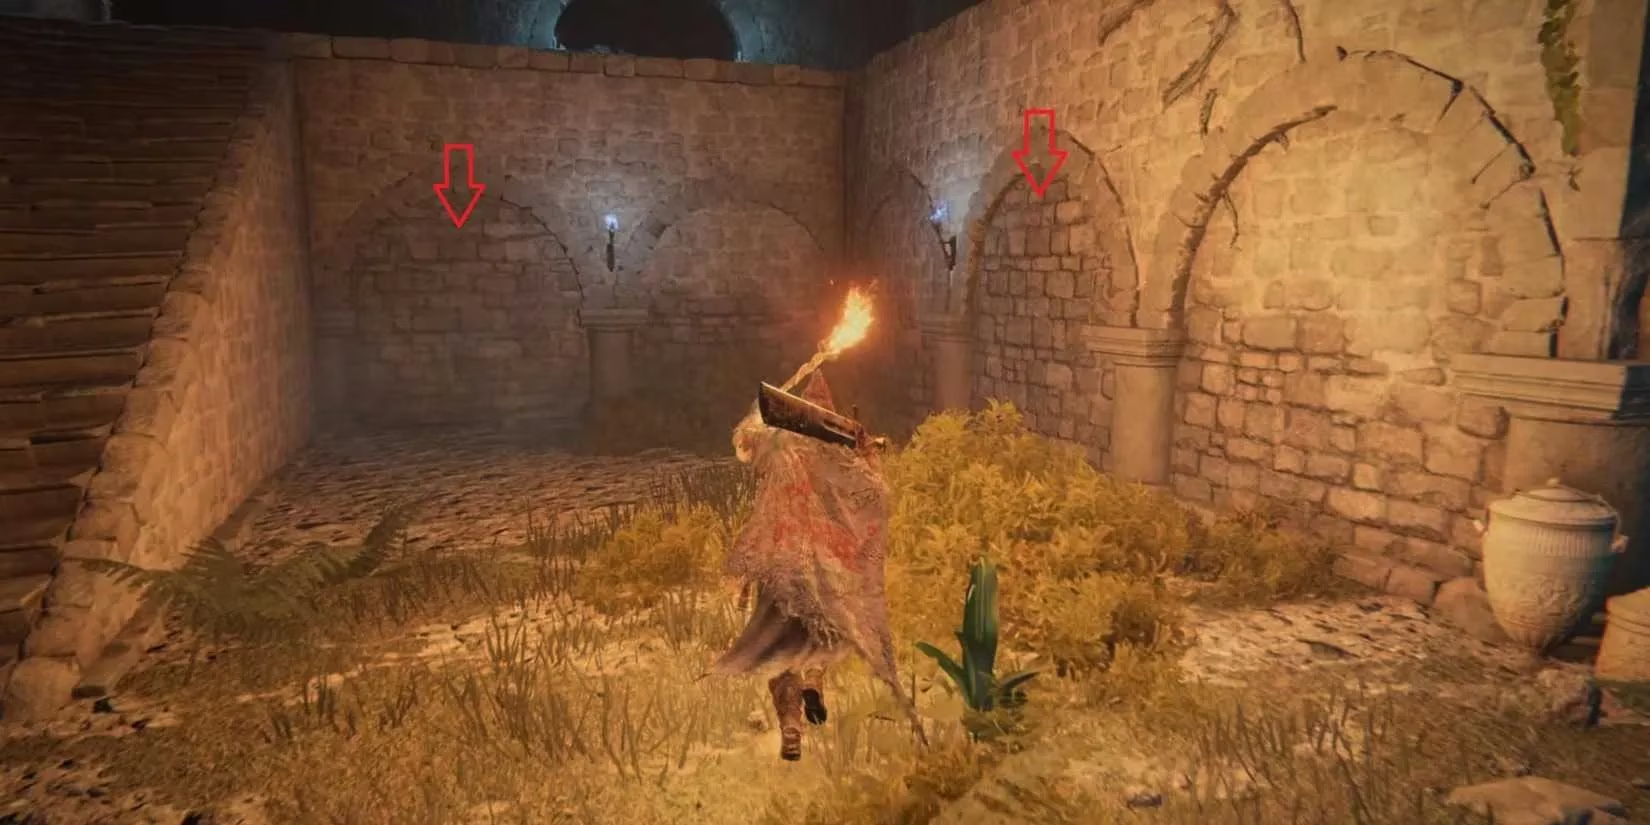
The subsequent room, centered around a large pillar, offers more Glovewort to gather but appears to be a dead end. At the far side, an alcove seems to terminate in a solid stone wall. This is the catacombs' first major illusion. A solid strike reveals the falsity, crumbling the wall to show a chamber beyond with an altar and a chest.
Extreme caution is advised here. The chest is bait for a vicious trap. As you approach, one Imp drops from the ceiling. However, two more crafty Imps stand motionless like statues flanking the entranceway, waiting to pounce once your back is turned. After clearing this treacherous trio, the chest can be safely opened to obtain the Raya Lucaria Soldier Ashes, a useful spectral summon.
This path now truly ends. The boss door remains elusive, requiring a retreat back through the catacombs, past the now-familiar pressure plate trap.
Unlocking the Hidden Chambers and the Watchdog's Prize
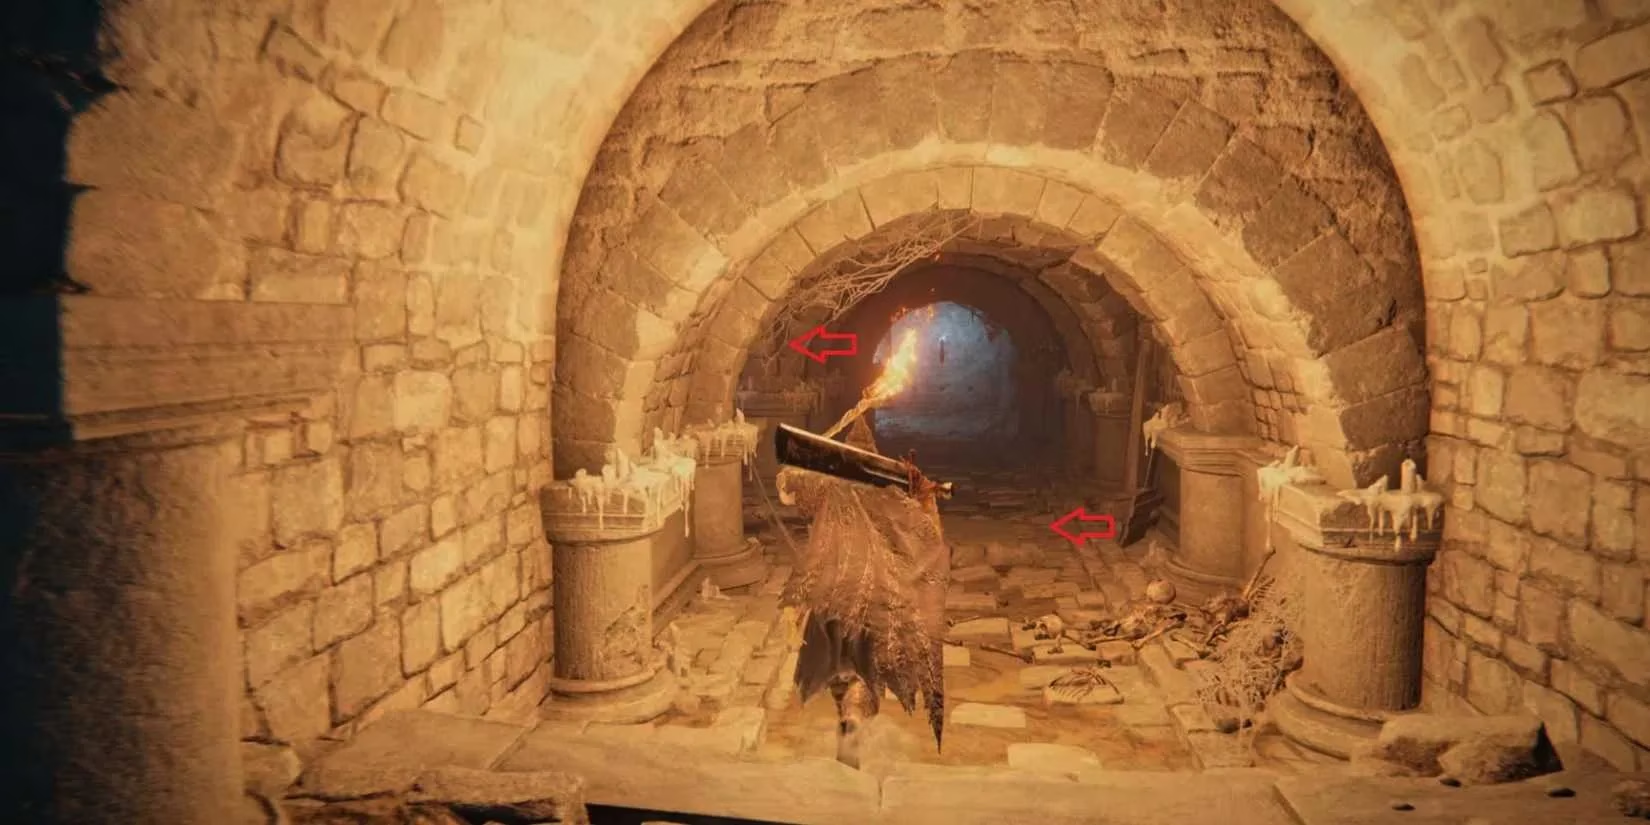
The true secret to progressing lies not in going forward, but in looking closer on the return journey. At the bottom of the first major staircase, a single blue torch burns on the wall. To its left are two seemingly bricked-up alcoves. Both are illusory walls. Striking them open reveals a hidden side chamber.
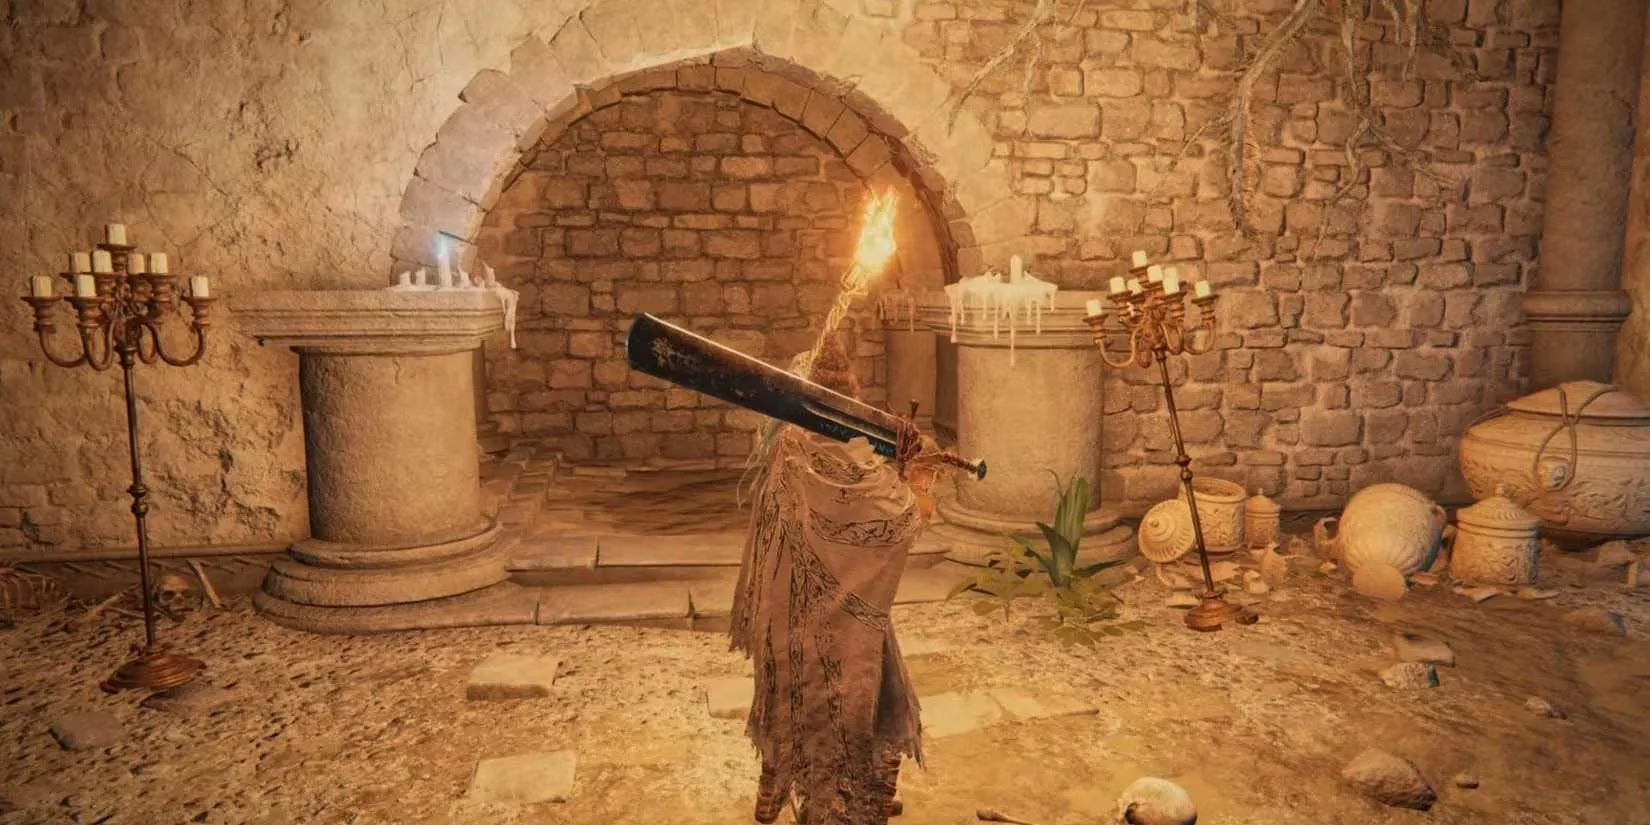
Inside, two patient Imps cling to the walls, ready to execute a punishing grab attack. Their defeat yields valuable spoils: a Grave Glovewort [3], a Human Bone Shard, and the dungeon's premier physical reward—the Watchdog's Staff. Despite its name suggesting a magical focus, this weapon is in fact a superb Strength-based greatstaff, capable of delivering crushing blows.
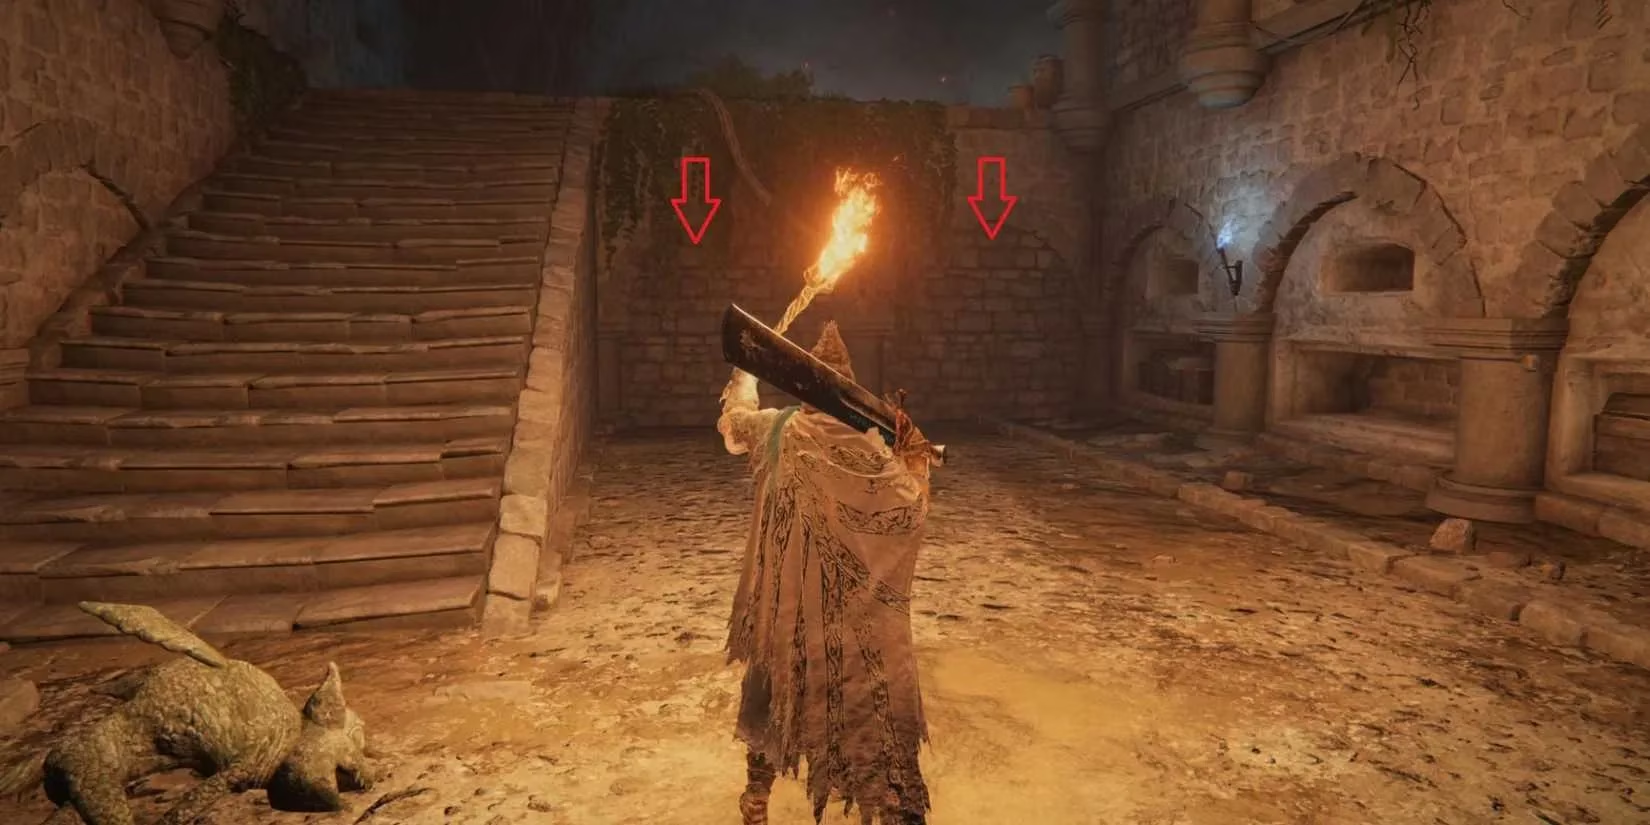
The puzzle continues upstairs. At the next landing, facing the corner to the right of the stairs, the first and fourth alcoves in a row are also illusions. Within lies a patrolling Imp, a Ghost Glovewort [2], and a Rune Arc. More importantly, the fourth alcove, once revealed, is not a room but the entrance to a narrow, hidden corridor—the true path forward.
This cramped passage descends to a dead-end with a corpse holding Root Resin. Yet another illusory wall here opens into a final stairway. At its bottom, one last fake wall conceals a final Grave Glovewort [2]. Beyond it, the sight is a relief: the imposing boss doors, now standing open thanks to the lever pulled long ago.
Confronting the Spirit-Caller Snail
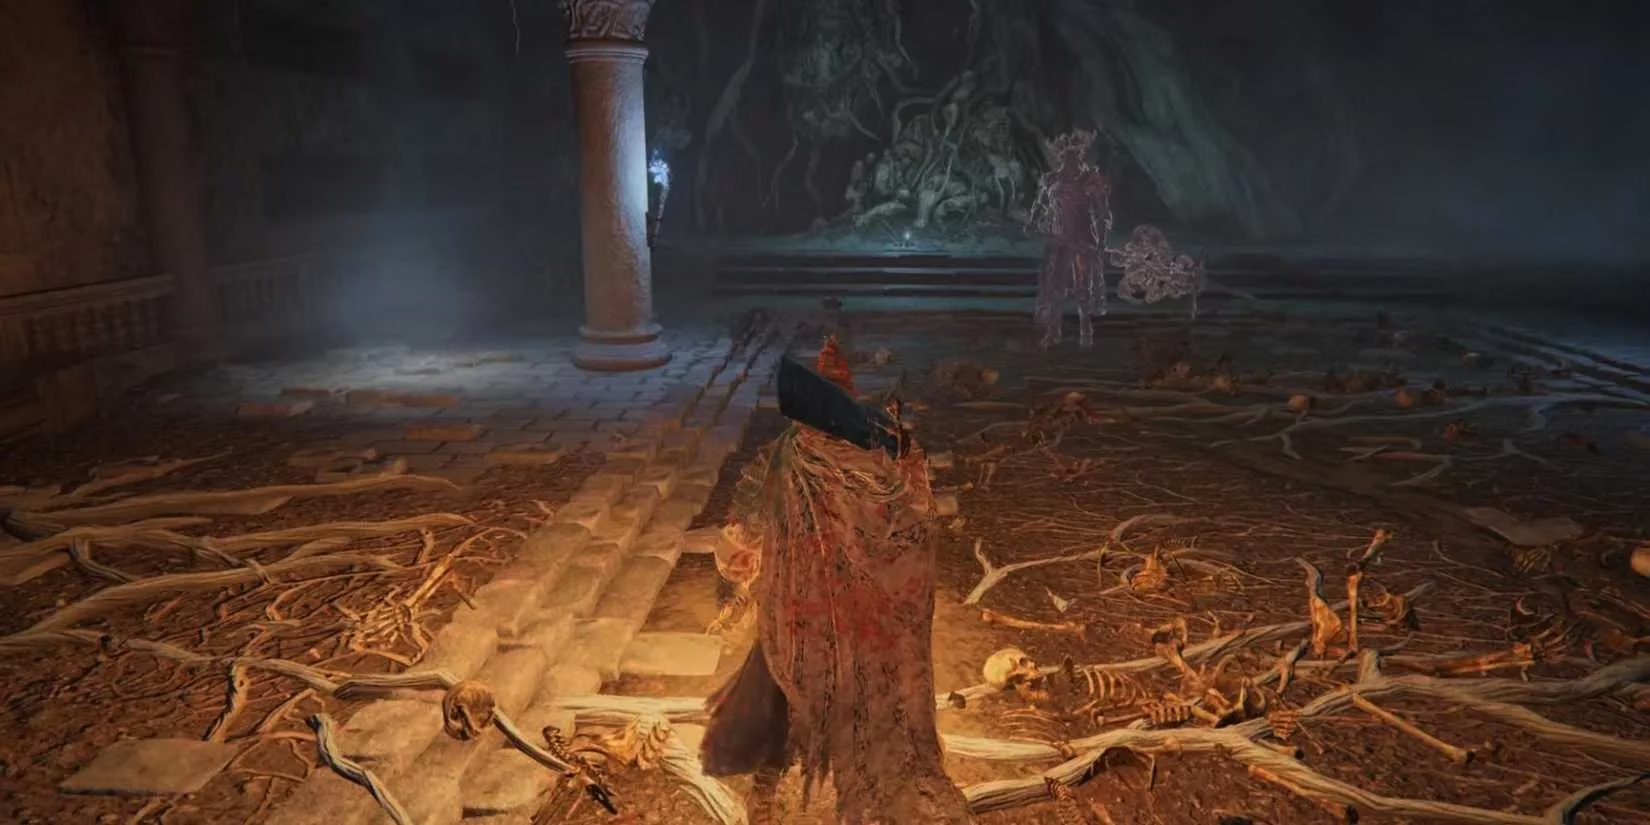
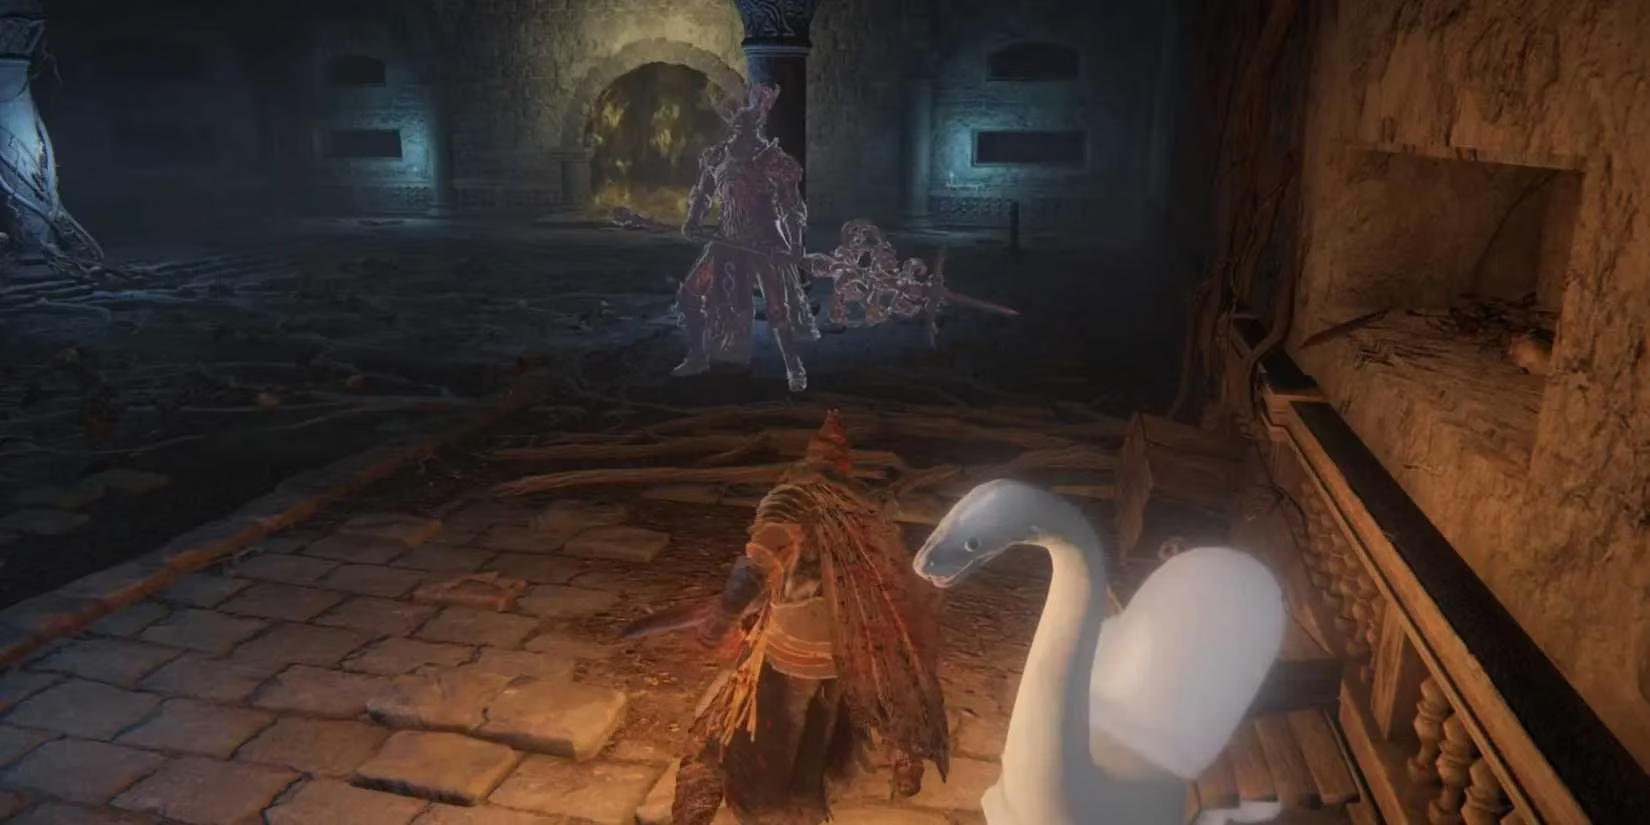
The boss encounter within is unorthodox. Upon entering, a highly aggressive spirit of a Crucible Knight wielding Siluria's Tree immediately engages. This formidable specter deals significant damage, but it is a distraction. Slaying it only causes it to be re-summoned. The true enemy is the Spirit-Caller Snail, a fragile conjurer that remains hidden.
The key to victory is perception. Scan the room for a soft, pulsing white glow on the ground. This glow marks the Snail's location. Striking it forces the creature to briefly materialize before teleporting to a new spot, again indicated by the glow. The strategy is a chaotic dance:
-
Evade the relentless assaults of the Crucible Knight spirit.
-
Locate the shimmering white glow.
-
Strike the revealed Spirit-Caller Snail quickly, as it is highly vulnerable.
-
Repeat the process, ignoring the knight where possible.
With persistence, the Snail falls, granting a victor's bounty of 3,000 Runes and the Glintstone Sorcerer Ashes, summoning spectral sorcerers to aid in future battles. The Road's End Catacombs, thus, teaches a valuable lesson: in the Lands Between, the end of the visible road is often just the beginning of the true journey.