As the dust settles in the Lands Between and the echoes of the Shadow of the Erdtree DLC become a fond memory for veterans, the humble Starlight Shard remains a coveted treasure. Think of them as the emergency caffeine shot for your magical reserves, a glimmering lifeline when your FP bar looks as empty as a banker's promise. Without a talisman to passively regenerate that blue juice, these celestial candy corns are your best bet for a quick top-up mid-boss-meltdown. They're rarer than a polite invader, and their locations are as predictable as a FromSoftware plot twist—often found perched precariously near those mysterious, bowl-shaped Stone Astrolabes on cliff edges, like cosmic gumdrop dispensers waiting for a worthy Tarnished.
All Limgrave Starlight Shard Locations

Your journey begins in the gentle (relatively speaking) embrace of Limgrave, which houses three Starlight Shards. Scooping these up early is wiser than challenging the Tree Sentinel naked. It gives you a magical safety net, letting you keep some FP in your back pocket for when that pack of wolves decides you look tastier than a Rowa Fruit. Having an extra magic spell or Ashes of War ready to unleash can be the difference between glorious victory and a loading screen, a lesson that remains true even against the newest nightmares from the Land of Shadow.
-
Location 1: Near the Stone Astrolabe southwest of the Church of Elleh.
-
Location 2: By the Astrolabe on the cliffs east of the Gatefront Ruins.
-
Location 3: At the Astrolabe on the high plateau near the Coastal Cave.
All Caelid Starlight Shard Locations
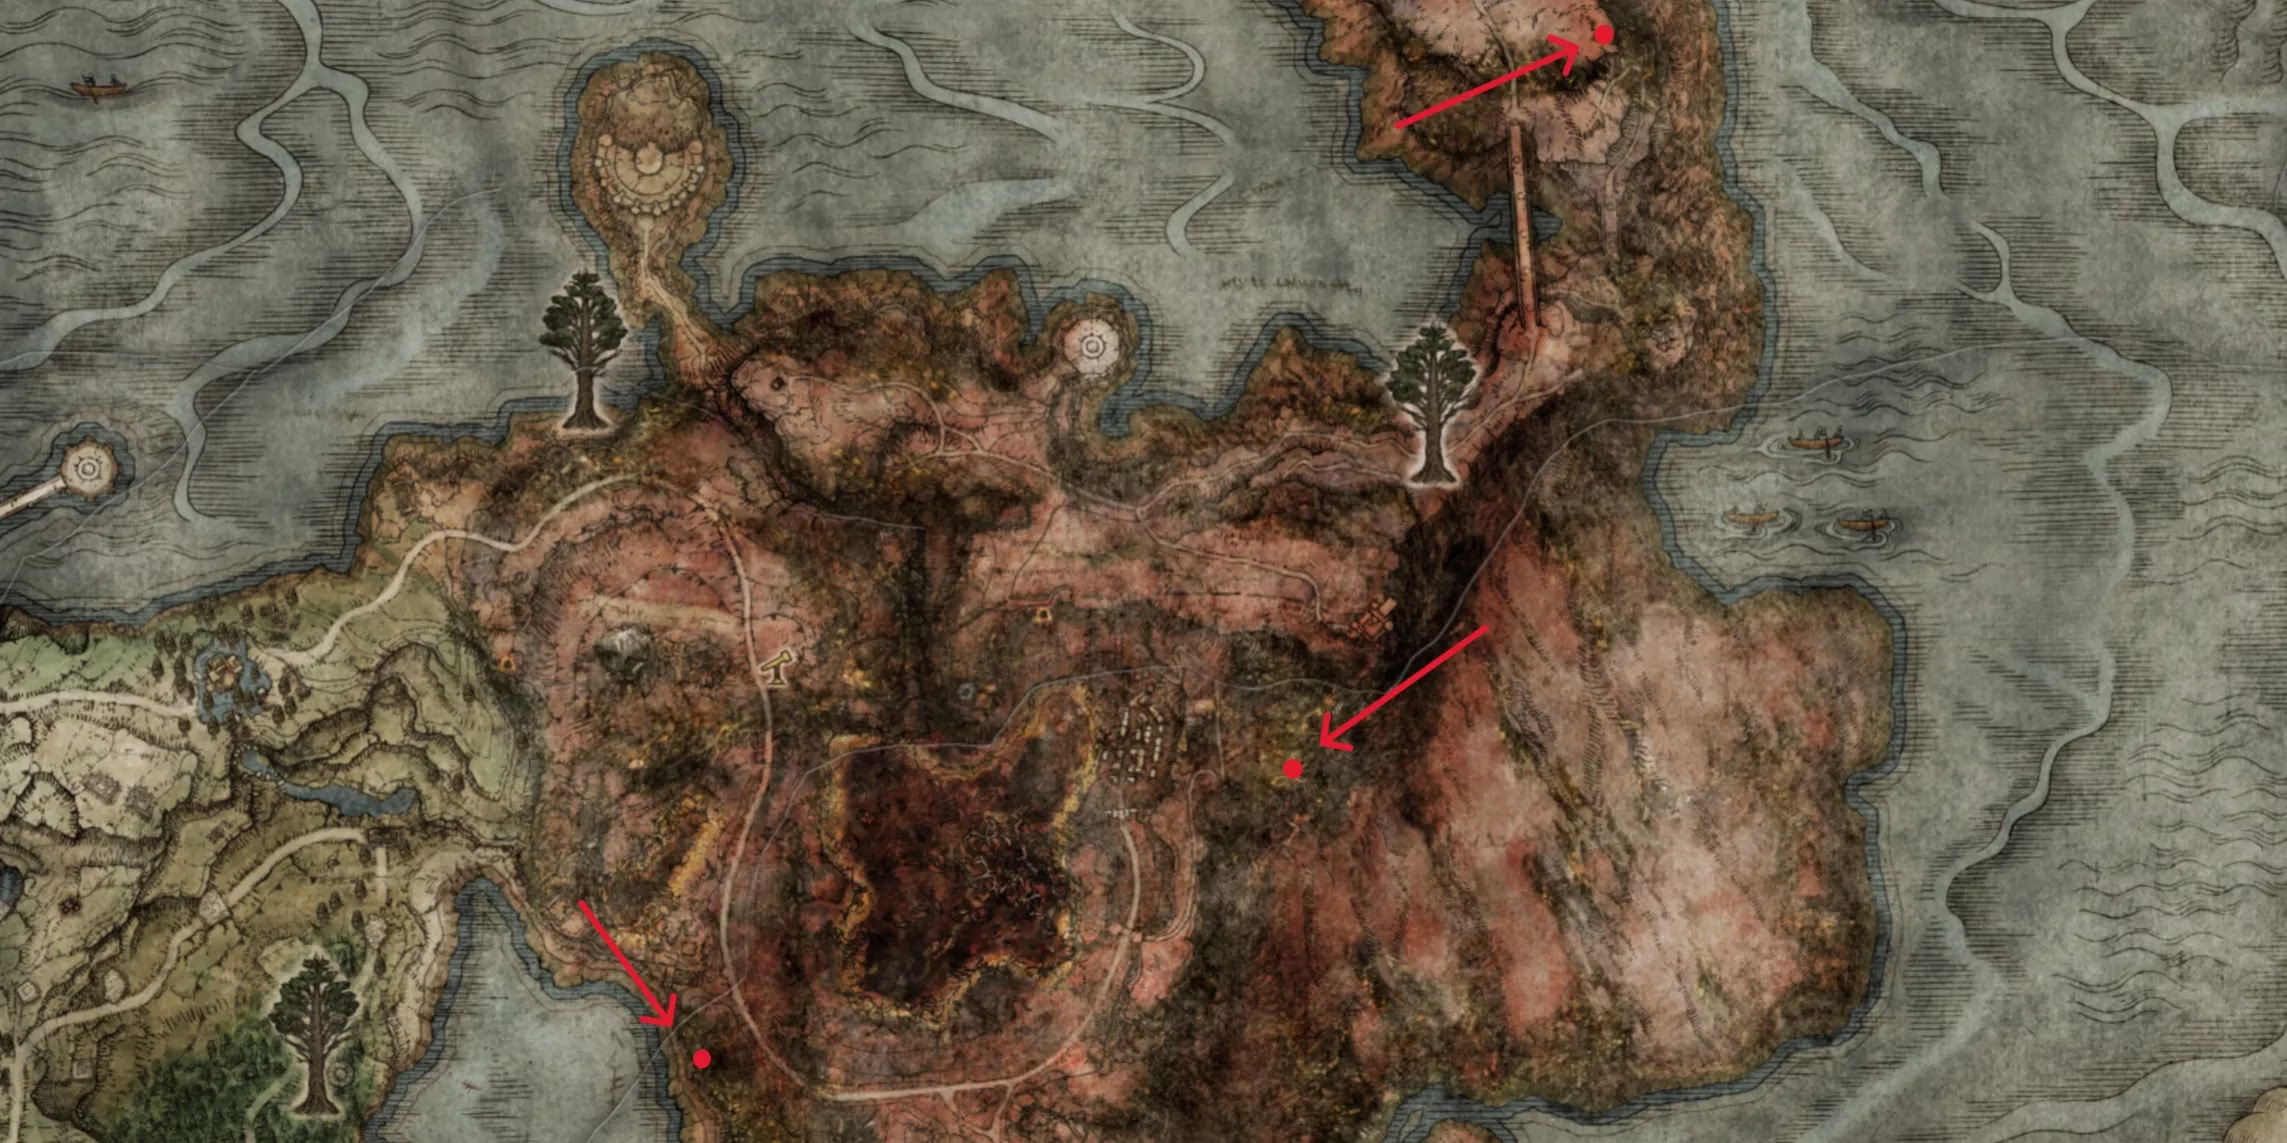
Ah, Caelid. The land where the grass screams and the air tastes of despair. It also holds three Starlight Shards, shining like beacons of sanity in a sea of scarlet rot. While it's advisable to be around levels 60-70 before venturing here, a sneaky Tarnished can nab these goodies early. You don't need to rush heading into the war-torn area like a tourist in a dragon's den, but for the dedicated Shard-speedrunner, the path is clear. Grab them and flee before the local wildlife asks for a snack.
-
Location 1: At the Astrolabe near the Smoldering Church.
-
Location 2: By the structure on the cliffs southeast of the Sellia Gateway.
-
Location 3: Near the Astrolabe west of the Cathedral of Dragon Communion.
All Liurnia of the Lakes Starlight Shard Locations
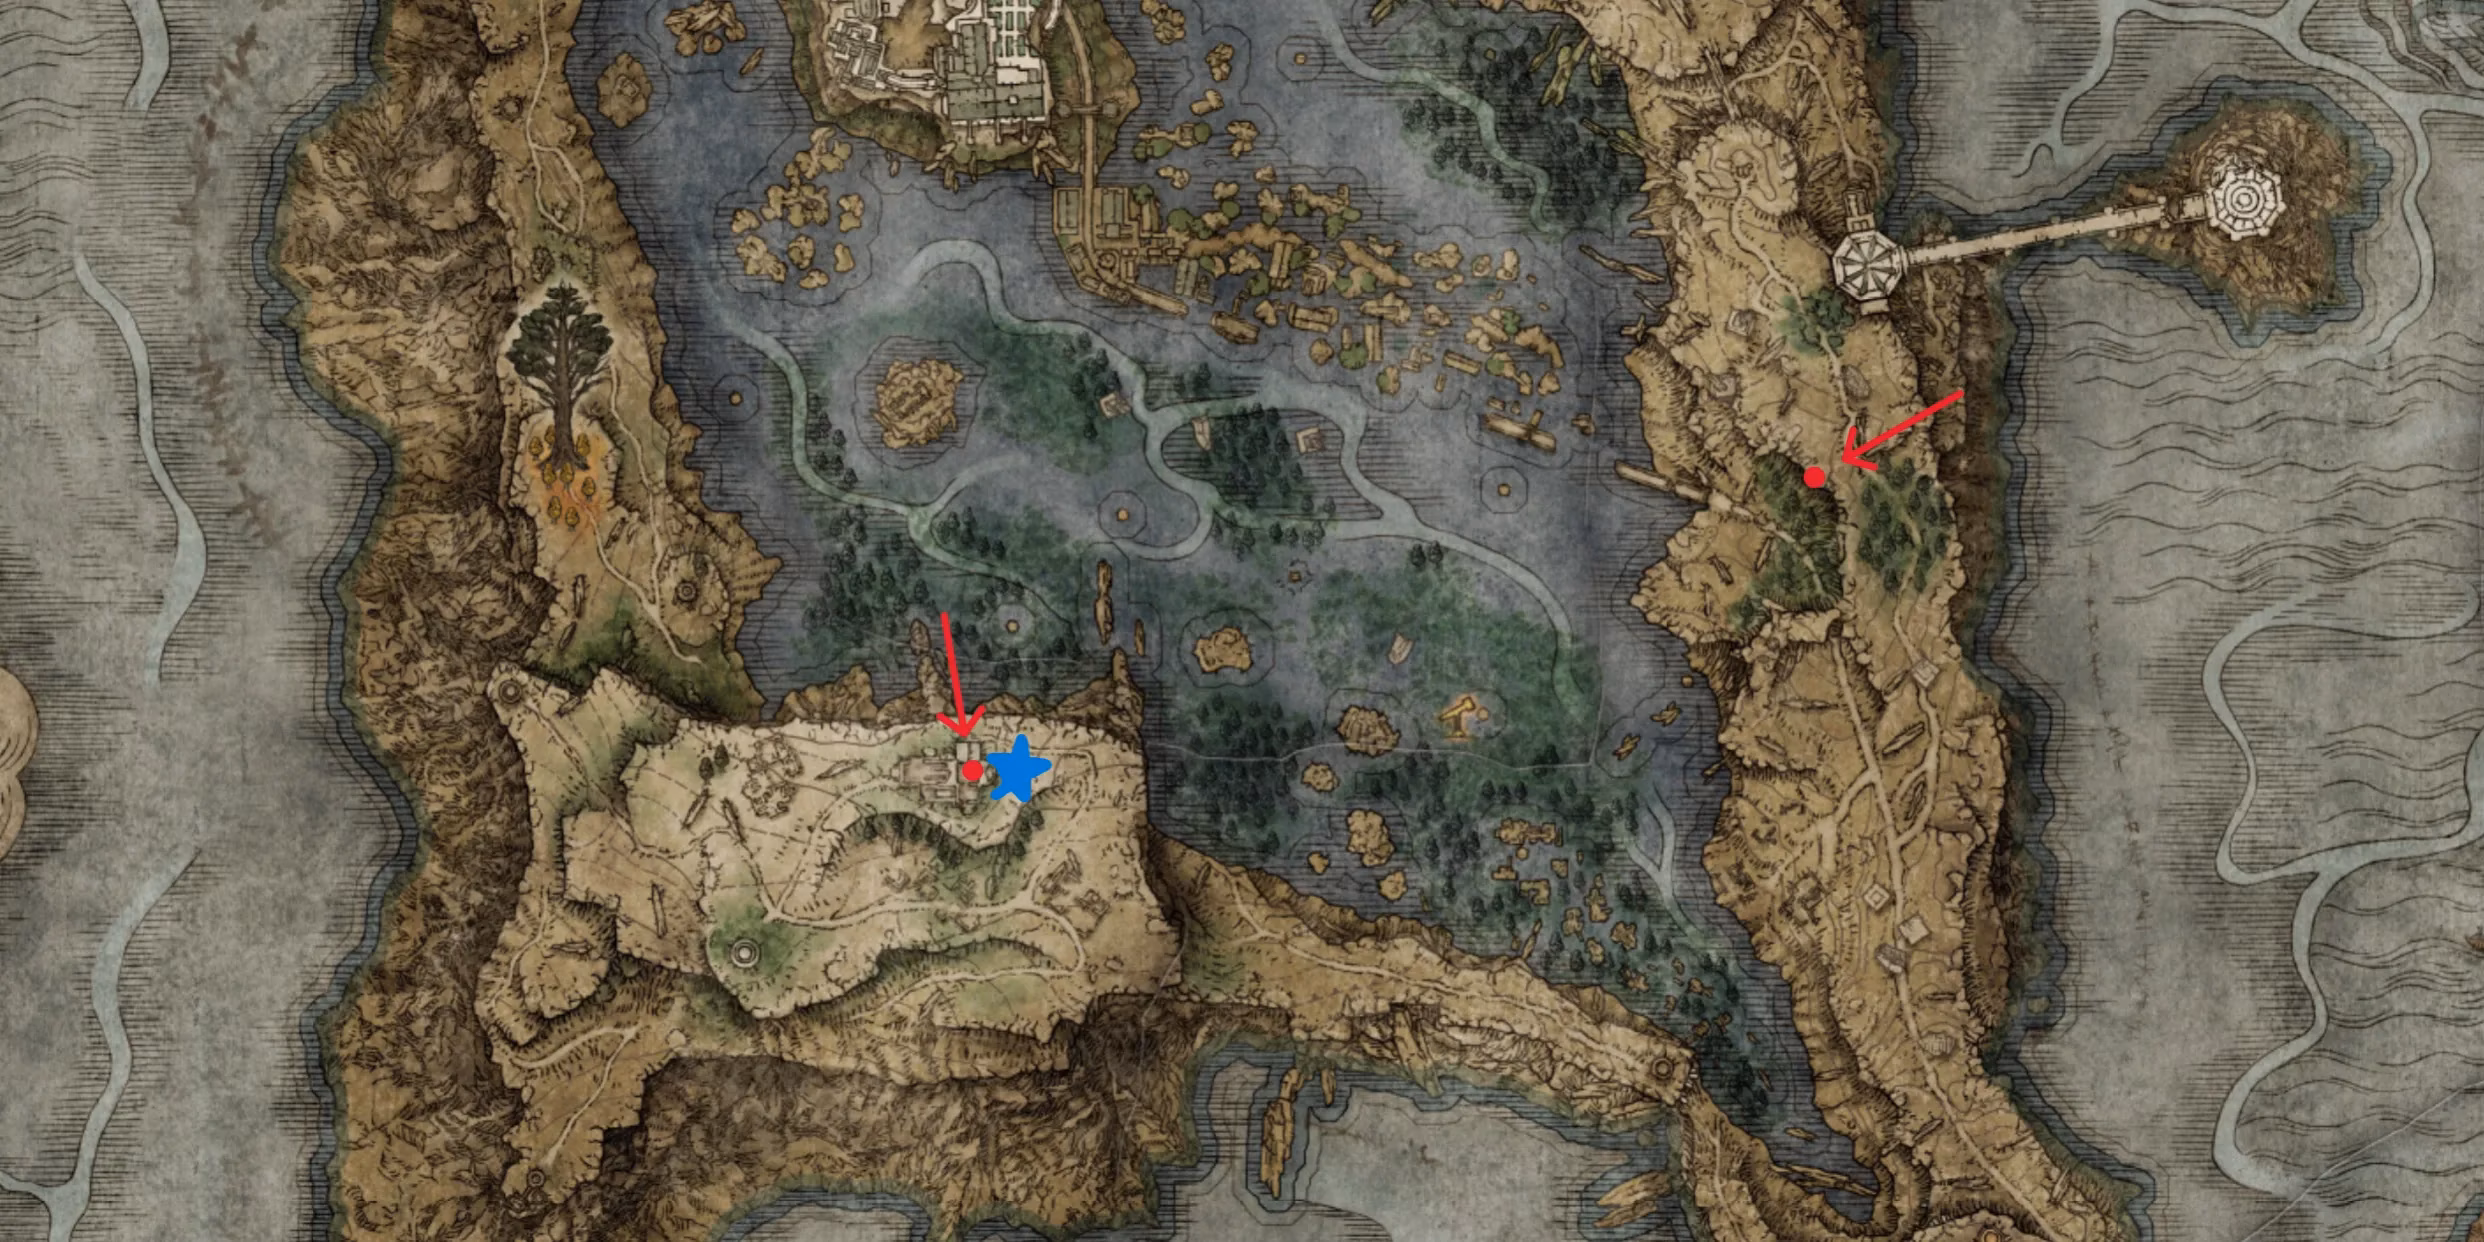
Liurnia is the land of magic, mystery, and generous Shard drops. While there are only three Starlight Shard locations in Liurnia of the Lakes, each one is a veritable piñata, netting you a whopping 12 total Shards. It's like finding a vending machine that gives you four sodas for the price of one. A word of caution, though: the game allows you to hold up to 10 Starlight Shards at a time in your pocket. Don't be the Tarnished who drops precious cosmic energy because their pockets are full! Stash them in your bottomless chest, which can hold up to 999, leaving you free to hoard like a dragon with a shiny new obsession.
-
Location 1 (4 Shards): At the Astrolabe on the island south of the Academy Gate Town.
-
Location 2 (4 Shards): By the Astrolabe on the cliff west of the Raya Lucaria Academy.
-
Location 3 (4 Shards): At the Astrolabe on the plateau northeast of the Village of the Albinaurics.
All Altus Plateau Starlight Shard Locations
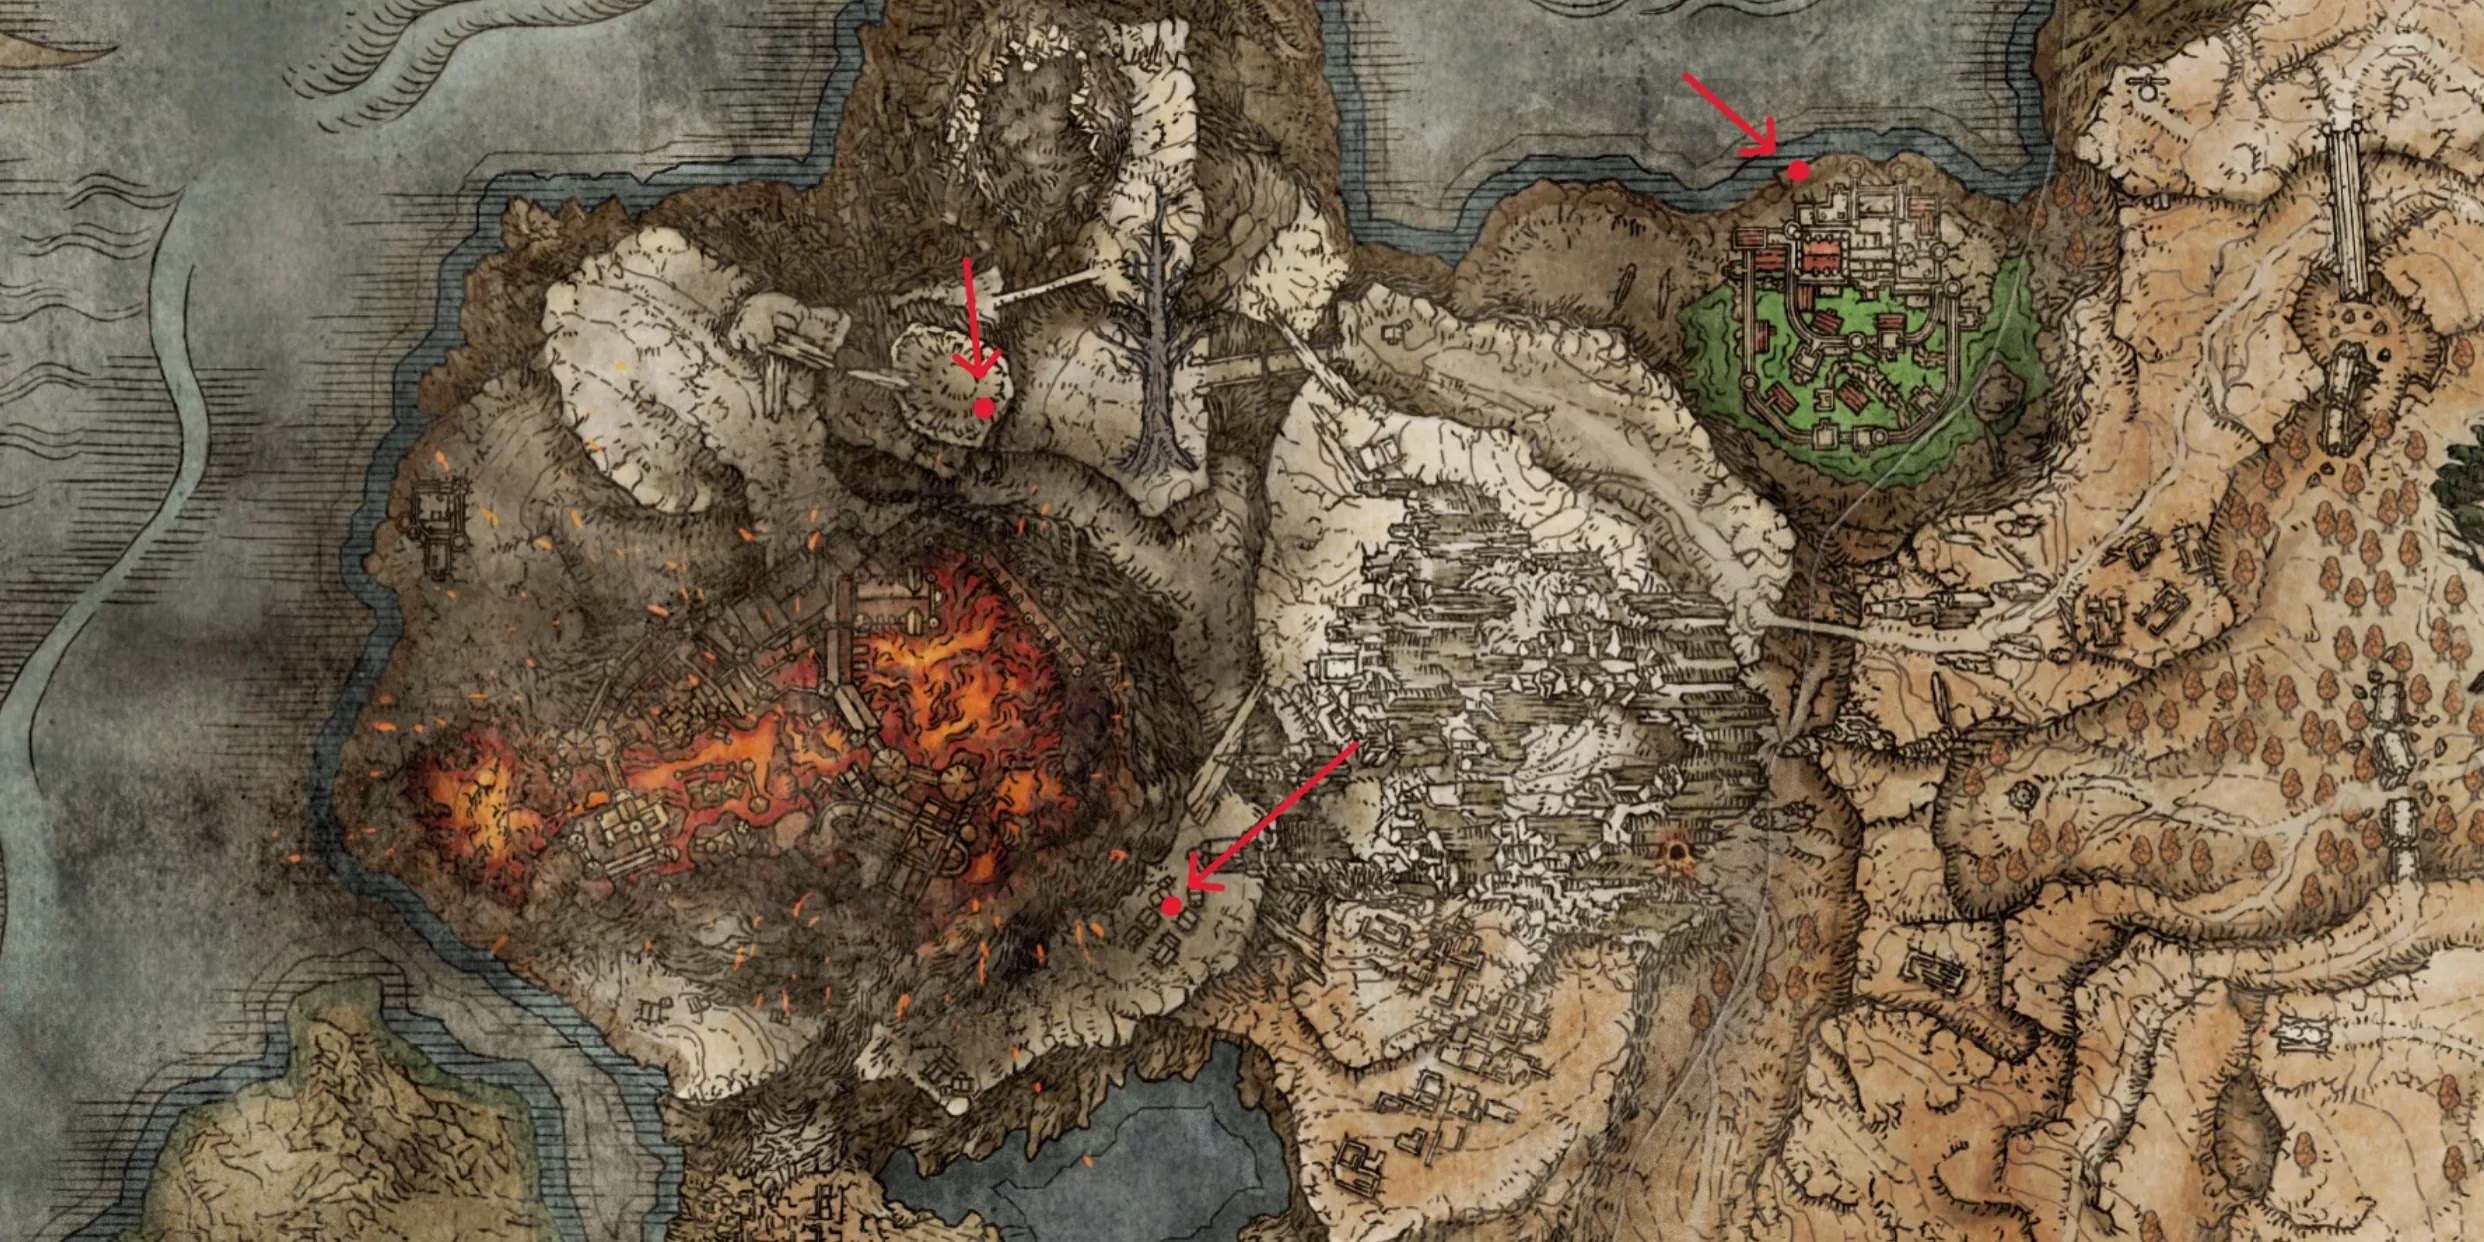
Returning to the standard rate of distribution, the golden Altus Plateau offers three Starlight Shards. By now, collecting them should feel as routine as dying to a platforming section. They're your reward for navigating the windy roads and avoiding the perfumed nobles who hit harder than a runaway chariot.
-
Location 1: At the Astrolabe on the cliffs southeast of the Altus Highway Junction.
-
Location 2: By the structure north of the Windmill Village.
-
Location 3: At the Astrolabe on the edge of the plateau east of the Capital Outskirts.
All Mountaintops of the Giants Starlight Shard Locations
By the time you're shivering in the Mountaintops, you're practically a Starlight Shard connoisseur. If you still have room for more (and let's be honest, you do), two final Shards can be collected here. Consider them a parting gift from the Lands Before the freeze-your-tail-off era.
-
Location 1: At the Astrolabe on the path southwest of the Freezing Lake.
-
Location 2: By the structure on the cliffs east of the Ancient Snow Valley Ruins.
Bonus: The Sorcerer's Secret Starlight Shard
If you've scoured every cliffside and your inventory is bursting with celestial glow-sticks, there's one last Shard, hidden away like a final exam question. This involves the questline of everyone's favorite bodiless sorceress, Sellen. To nab it, you must find Master Lusat and chat with him. The path there is more convoluted than a Rune Bear's family tree:
-
Find Sorceress Sellen in the Waypoint Ruins and become her apprentice.
-
Tell her where Master Azur is (in Mt. Gelmir).
-
She'll give you a key to bust through a magical barrier hiding Master Lusat (in the Sellia Hideaway).
-
After finding the glintstone-bound sorcerer, return to her and tell her where he is.
Your reward for this scholarly detective work? The final, secret Starlight Shard. With this, your collection is complete, and you are officially prepared to cast spells with the reckless abandon of a toddler with a sparkler.
| Region | Number of Locations | Total Shards | Hoarder's Difficulty |
|---|---|---|---|
| Limgrave | 3 | 3 | 🌟 (A Gentle Start) |
| Caelid | 3 | 3 | 🌟🌟🌟 (Watch Your Step) |
| Liurnia | 3 | 12 | 🌟🌟 (The Jackpot Zone) |
| Altus Plateau | 3 | 3 | 🌟🌟 (Scenic Collection) |
| Mountaintops | 2 | 2 | 🌟🌟🌟 (The Final Chill) |
| Quest Reward | 1 | 1 | 🌟🌟🌟🌟 (Puzzle Time) |
So there you have it, Tarnished. With this guide, you can amass a stockpile of Starlight Shards so vast, your FP bar will blush with envy. Now go forth, and may your magic never sputter out at a crucial moment—unless it's funny, of course. 😉