In the vast, unforgiving world of Elden Ring, the Gelmir Hero Grave stands as one of the most distinctive and treacherous side dungeons, a testament to the game's intricate design and hidden depths. Located within the volcanic region of Mt. Gelmir, this sprawling labyrinth presents a significant challenge for the Tarnished, demanding careful navigation and combat prowess. While the main path to the Volcano Manor beckons the attention of many adventurers, the Gelmir Hero Grave offers its own unique rewards and trials, making it a worthwhile detour for those seeking to uncover every secret the Lands Between have to offer. The dungeon's entrance, often overlooked, is guarded by a pack of wolves, serving as the first of many obstacles within.
Location and Initial Access
Reaching the Gelmir Hero Grave is an adventure in itself. Access is only possible after arriving at the Altus Plateau, a major milestone in any Tarnished's journey. This can be achieved by two primary methods:
-
Activating the Grand Lift of Dectus using both halves of the Dectus Medallion.
-
Traversing the Ruin-Strewn Precipice and defeating the formidable Magma Wyrm boss.
Upon reaching the Alt�的highlighted area, travel counter-clockwise, following a path reminiscent of the route marked on the map. This journey leads to the Bridge of Inequity Site of Grace. From this checkpoint, the path to the grave begins: climb a ladder, navigate around the mountainous terrain, bypass a watchtower, and you will find the dungeon's imposing entrance.
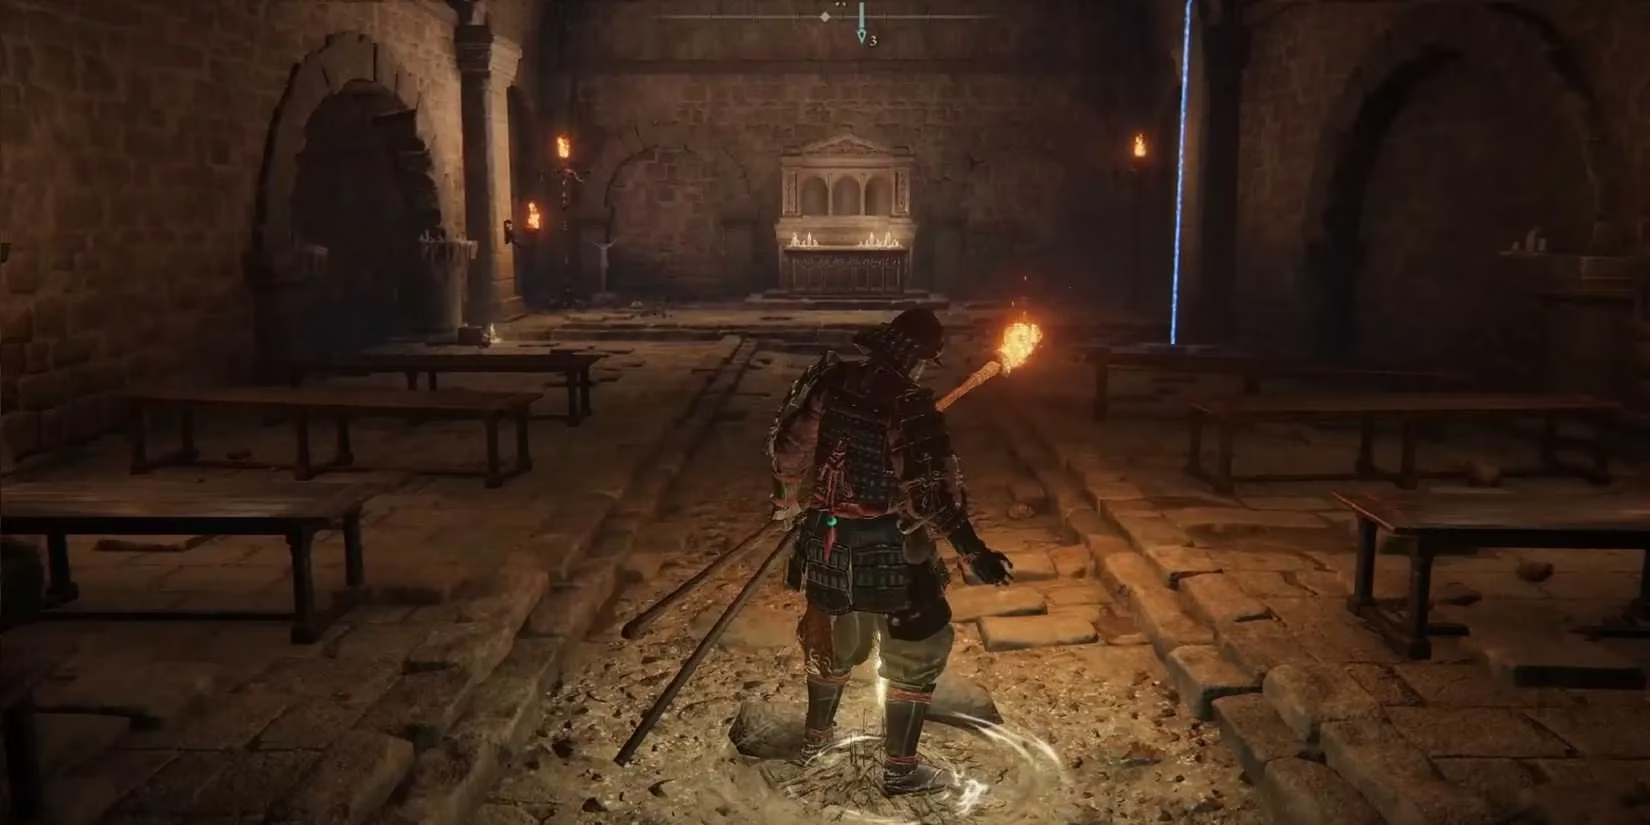
Lifting the gate and descending via an elevator plunges you into the depths of the grave, where a Site of Grace awaits, allowing you to save your progress and prepare for the exploration ahead.
Loot and Rewards
The Gelmir Hero Grave is far more complex than a standard catacomb. Its multi-layered, trap-ridden layout hides numerous valuable treasures, making thorough exploration highly rewarding. The primary attraction is the variety of unique items and equipment that can be acquired here.
| Item | Type | Description/Benefit |
|---|---|---|
| Ringed Finger | Weapon (Hammer) | A bizarre, giant finger weapon that can be used to poke and slam enemies with unique animations. |
| Bloodhound Knight Floh Ashes | Spirit Ash Summon | Summons the spirit of Bloodhound Knight Floh, a powerful and agile ally for combat. Obtained by defeating a Red Wolf boss within the grave. |
| Mantis Blade | Weapon (Curved Sword) | A distinctive curved sword with a special heavy attack that extends its blade for greater reach. |
| Bloodhound Knight Set | Armor Set | The full armor set of the Bloodhound Knights, offering solid protection with a distinctive, bestial aesthetic. |
| Gelmir Knight Set | Armor Set | The armor worn by the knights of Mt. Gelmir, providing good fire resistance and a rugged, volcanic look. |
Acquiring the Bloodhound Knight Floh Ashes requires defeating a challenging Red Wolf boss, reminiscent of the foe encountered earlier at the Academy of Raya Lucaria, but within the confined, hazardous spaces of the grave.
Dungeon Layout and Challenges
The design of Gelmir Hero Grave is notoriously devious. It is filled with:
-
Deadly Traps: The dungeon is infamous for its use of patrolling, which can be dangerous if not navigated carefully.
-
Environmental hazards:
-
Ambiguous and well-hidden areas:
-
Tough enemy placements:
The multi-layered structure of the dungeon, with its interconnected and ambiguous areas, encourages careful and patient exploration, as rushing forward often leads to unexpected and dangerous encounters. The primary challenge lies not just in combat, but in navigating the treacherous environment itself.
Boss Encounter and Strategy
The climax of the Gelmir Hero Grave is the battle against the Red Wolf of the Champion. This boss is an aggressive, magic-wielding beast similar to its counterpart in Raya Lucaria, but within the more confined arena of the grave. Key strategies include:
-
Maintain distance to avoid its swift lunges and magical projectile attacks.
-
Time your dodges carefully to evade its combos.
-
Use the arena's pillars for brief cover, though be aware they can be destroyed.
-
Aggressive melee pressure during its recovery phases can be effective for strength-based builds.
Victory rewards you with the Bloodhound Knight Floh Spirit Ash, a powerful summon for future battles.
Tips for Exploration and Conclusion
Successfully navigating and looting the Gelmir Hero Grave requires preparation and patience. Here are some essential tips:
-
Come Prepared: Ensure your character is adequately leveled, with upgraded weapons and a good stock of healing items.
-
Light Source: Carrying a torch or using spells like Starlight can be invaluable in the darker sections.
-
Move Cautiously: Always check for traps and ambushes. Listen for audio cues and watch for environmental tells.
-
Thorough Search: Many items are tucked away in side passages or at the end of perilous paths. Leave no stone unturned.
In conclusion, the Gelmir Hero Grave is a quintessential Elden Ring experience—challenging, rewarding, and rich with secrets. It tests a player's combat skills, environmental awareness, and perseverance. For the Tarnished willing to brave its dangers, the dungeon offers not just powerful gear and spirits, but the profound satisfaction of conquering one of the Lands Between's more ingeniously designed and perilous locations. The treasures within, from the peculiar Ringed Finger to the loyal Bloodhound Knight Floh, are well worth the trial. 😤⚔️