Alright, fellow Tarnished! Buckle up because we're diving deep into one of Elden Ring's most iconic (and creepy) open-world field bosses: the Deathbirds and their nastier cousins, the Death Rite Birds. I've spent way too many nights hunting these big, doll-headed monstrosities across the Lands Between and the Land of Shadow, so let me break it all down for you in 2026. Remember, they only come out at night, so prepare for some spooky showdowns under the stars! 🦉
The first thing to know? These aren't your typical arena-locked bosses. You find them out in the wild, and you can fight them on horseback if you're brave (or foolish) enough. But trust me, sometimes Torrent is more of a liability. You lose that precious dodge roll, and these birds are fast. The rewards, though? Absolutely worth the terror.
Let's start from the beginning and work our way up to the toughest ones, including the newbie from the Shadow of the Erdtree DLC!
🪦 The Regular Deathbird Crew
These guys are your introduction to the family. Tough, but manageable once you learn their tricks.
1. Limgrave Deathbird
This is your first taste, found east of the Warmaster's Shack. It's the perfect tutorial boss for this enemy type.
-
My Tip: I tried staying on Torrent here, and it was a mistake. Its pecks and sweeps are too quick. Go on foot, stay close to its legs, and learn its patterns. The roll is your best friend.
-
Reward: Blue-Feathered Branchsword Talisman. Not the best, but a nice early-game boost when you're low on health.
2. Weeping Peninsula Deathbird
Southwest of the Castle Morne Rampart Site of Grace, near some ruins. The fight's the same, but the environment is different.
-
Crucial Weakness: Holy damage. These birds HATE it. If you have any Sacred Blade ash of war or holy grease, now's the time to use it. It makes a huge difference.
-
Reward: Sacrificial Axe. A nice weapon for FP recovery.
3. Liurnia of the Lakes Deathbird
Found north of the Scenic Isle. Liurnia is where things start getting spicy, and this fight is no exception.
-
Watch Out For: Lobsters and other local wildlife! Clear the area first, or you'll have a very bad time. Also, beware of its flying slam attack. Don't panic roll!
-
Reward: Red-Feathered Branchsword Talisman. The offensive counterpart to the blue one.
4. Capital Outskirts Deathbird
East of the Hermit Merchant's Shack. This one is tricky because of the company it keeps.
-
The Real Boss: The rolling snail enemies! They look silly but will mess you up if you ignore them. Deal with them quickly, then focus on the bird.
-
Reward: Twinbird Kite Shield. An awesome shield that gives you both the Branchsword talisman effects. A must-have for certain builds!
🔥 The Big Leagues: Death Rite Birds
Now we enter the danger zone. Death Rite Birds hit harder, have fiery AoE attacks, and will absolutely ruin your day if you're unprepared.
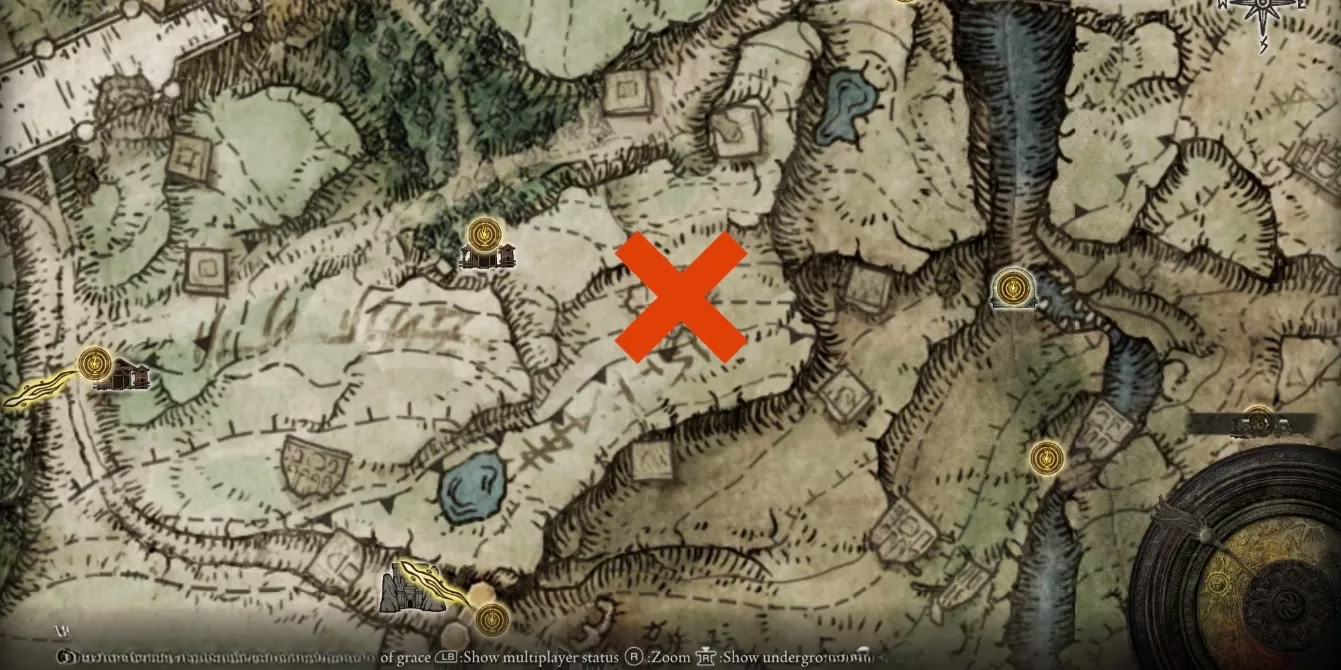
5. Caelid Death Rite Bird
Your first encounter with the big bad variant. Found east of the Southern Aeonia Swamp Bank.
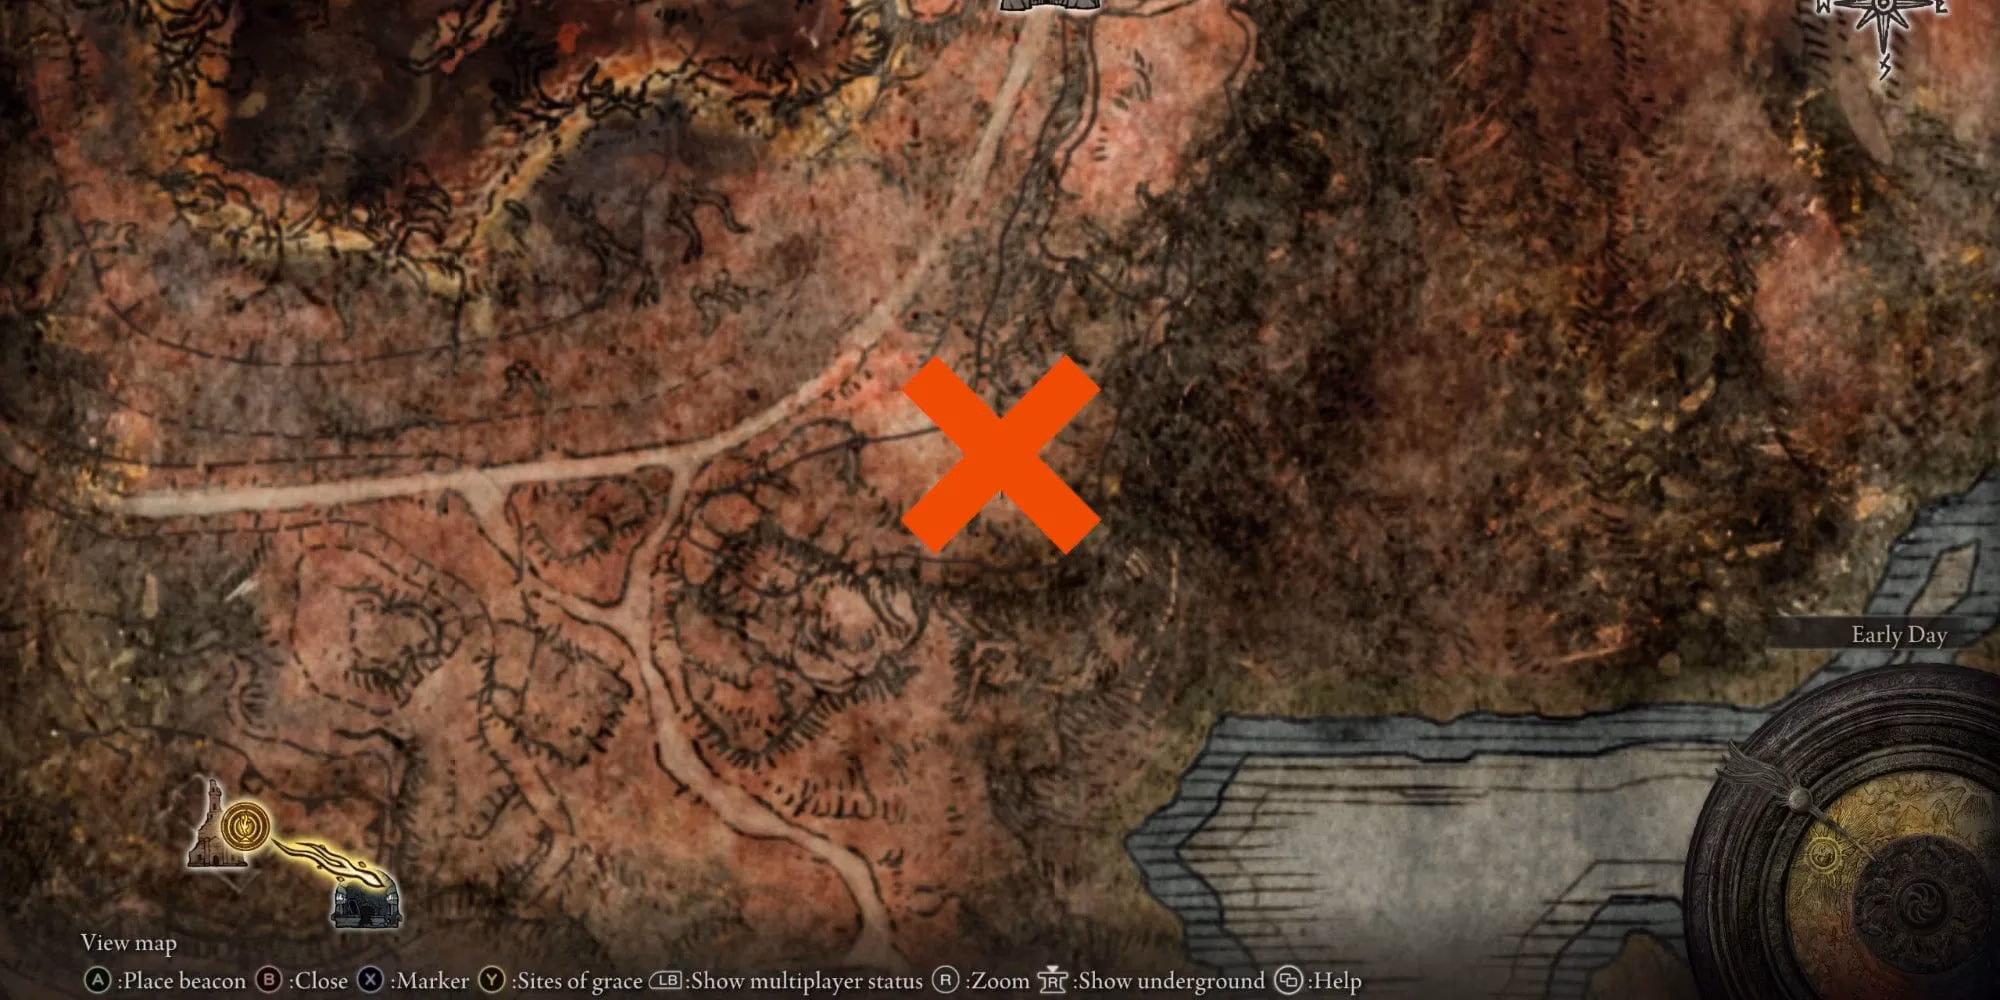
-
The Shock: The damage spike is real. One or two hits will likely finish you. Holy damage is even more essential here.
-
Reward: Death's Poker. A fantastic greatsword with a unique, powerful ash of war that spews ghostflame. Worth the pain!
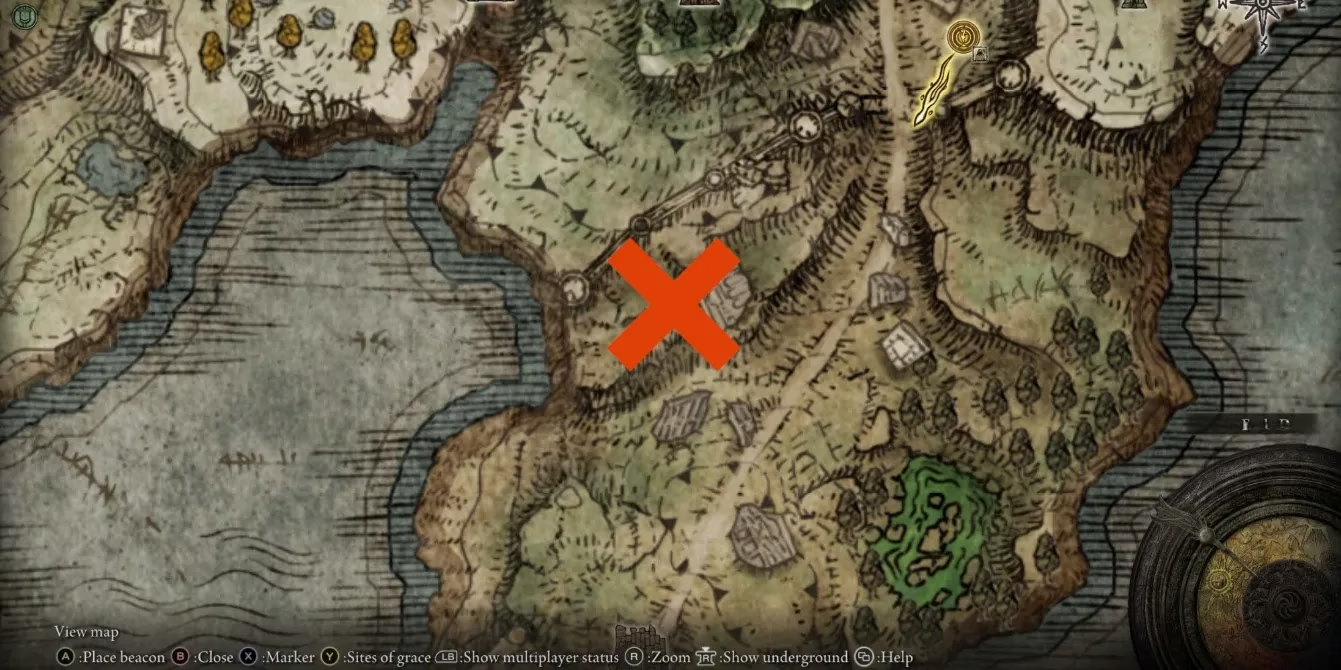
6. Liurnia (Again!) Death Rite Bird
South of Gate Town North. This one really makes horseback combat risky with its ground fire.
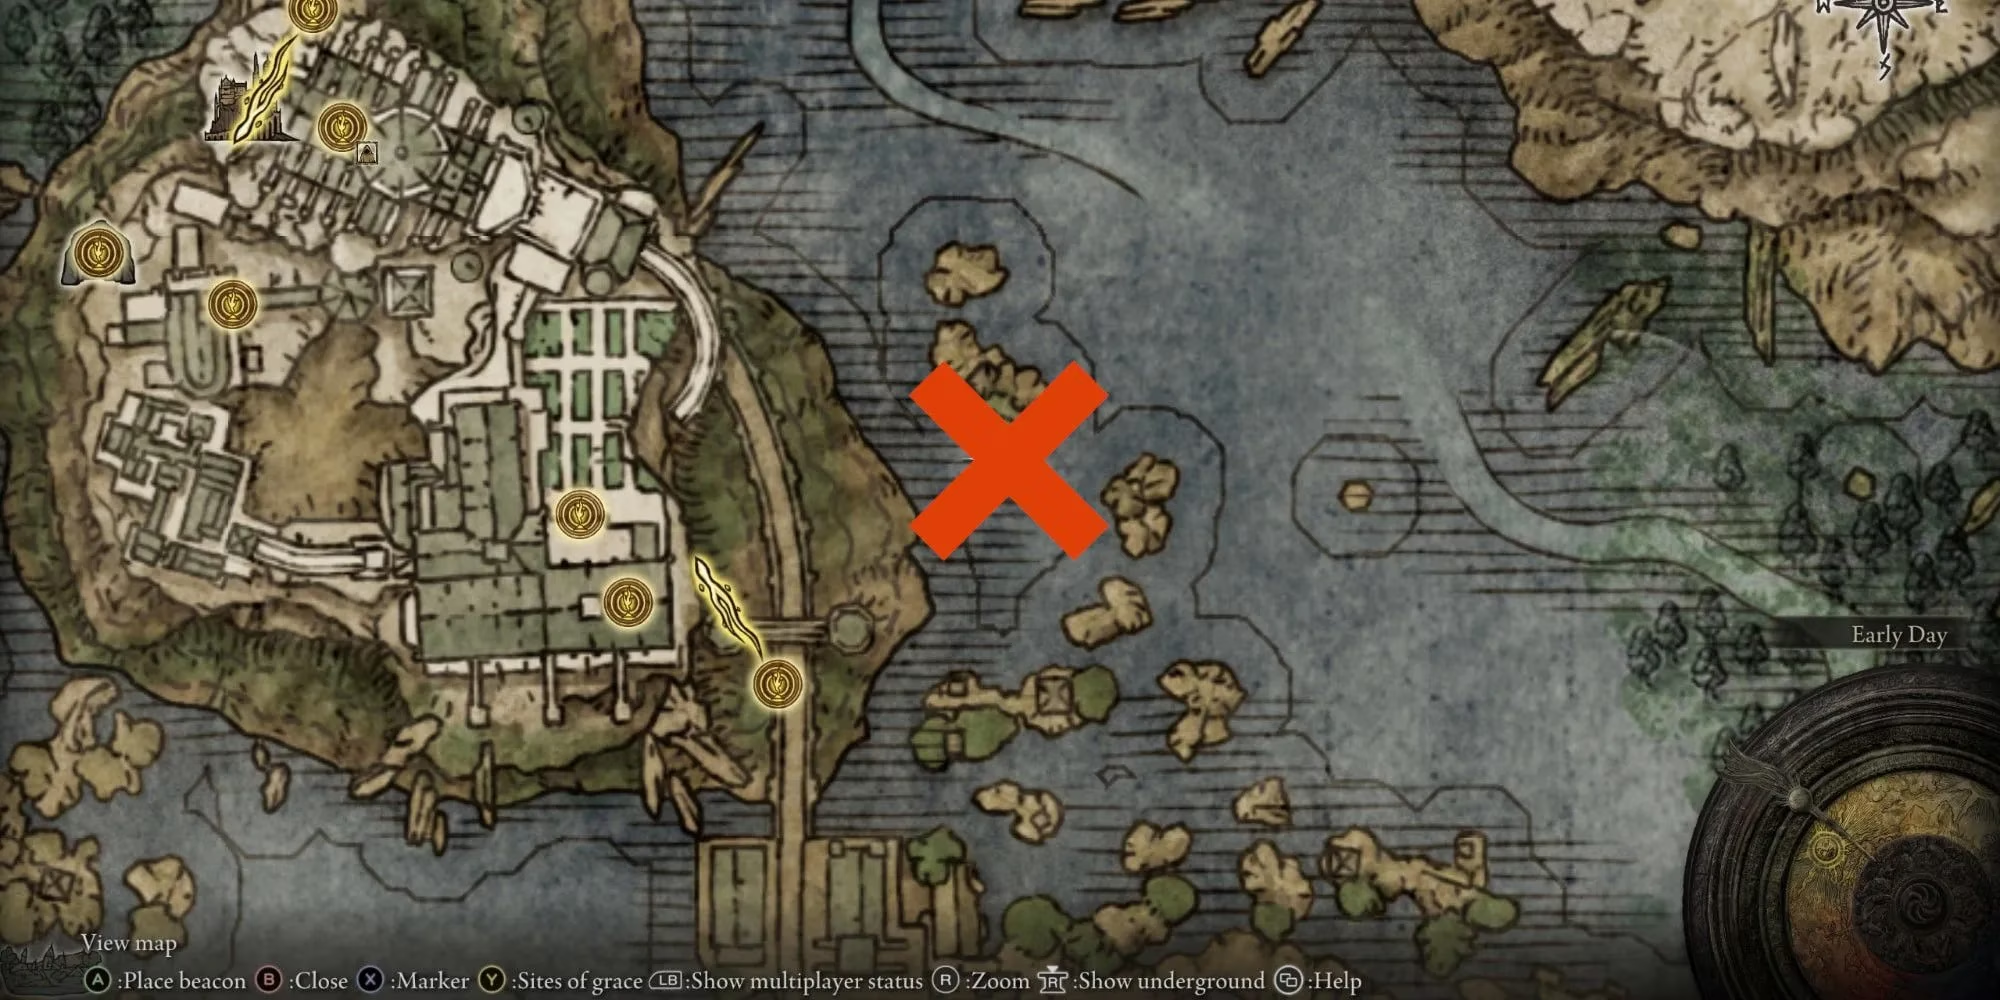
-
My Strategy: Fight on foot. You need the mobility to dodge its flame spears and aerial feather barrage. Blocking with a good holy-infused shield can also work.
-
Reward: Ancient Death Rancor Sorcery. A powerful spell that summons seeking skulls.
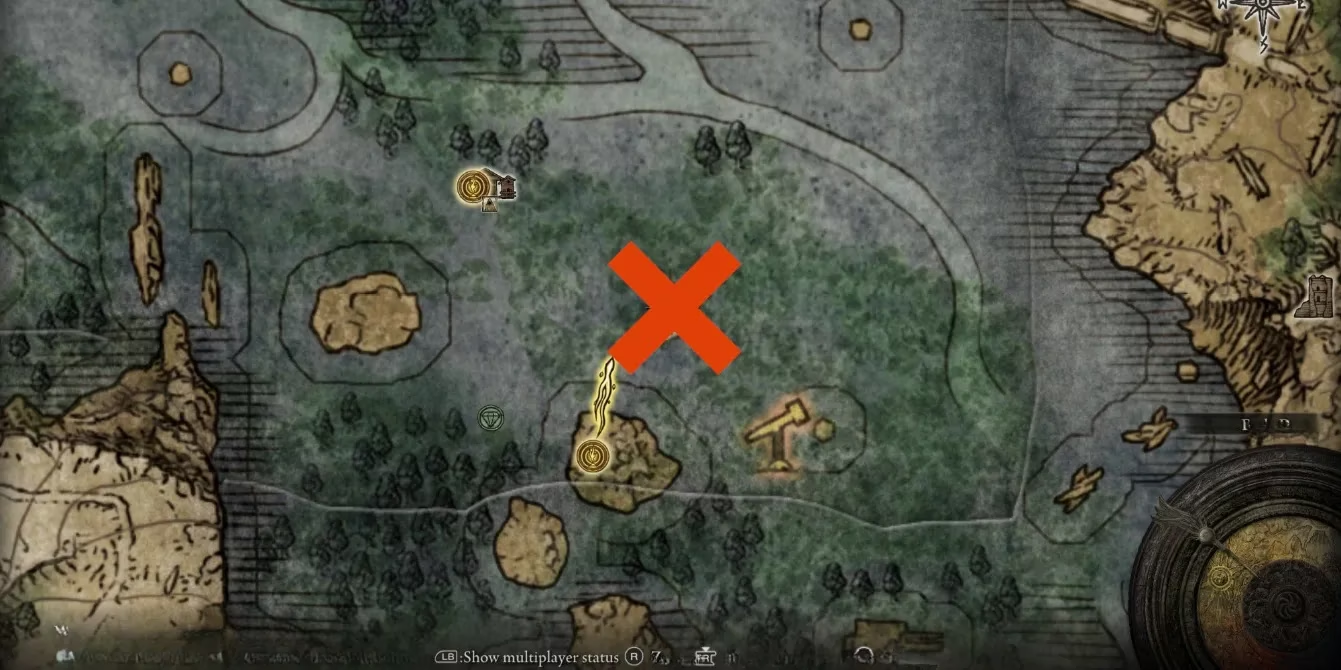
7. Central Mountaintops Death Rite Bird
Near the Snow Valley Ruins Overlook. By now, you should be a holy damage evangelist.

-
Pro-Tip: Holy Water Pots are your best friends! Craft them. Throw them. Watch its health melt. They turn a brutal fight into a manageable one.
-
Reward: Death Ritual Spear. A great spear with a long-range ash of war.
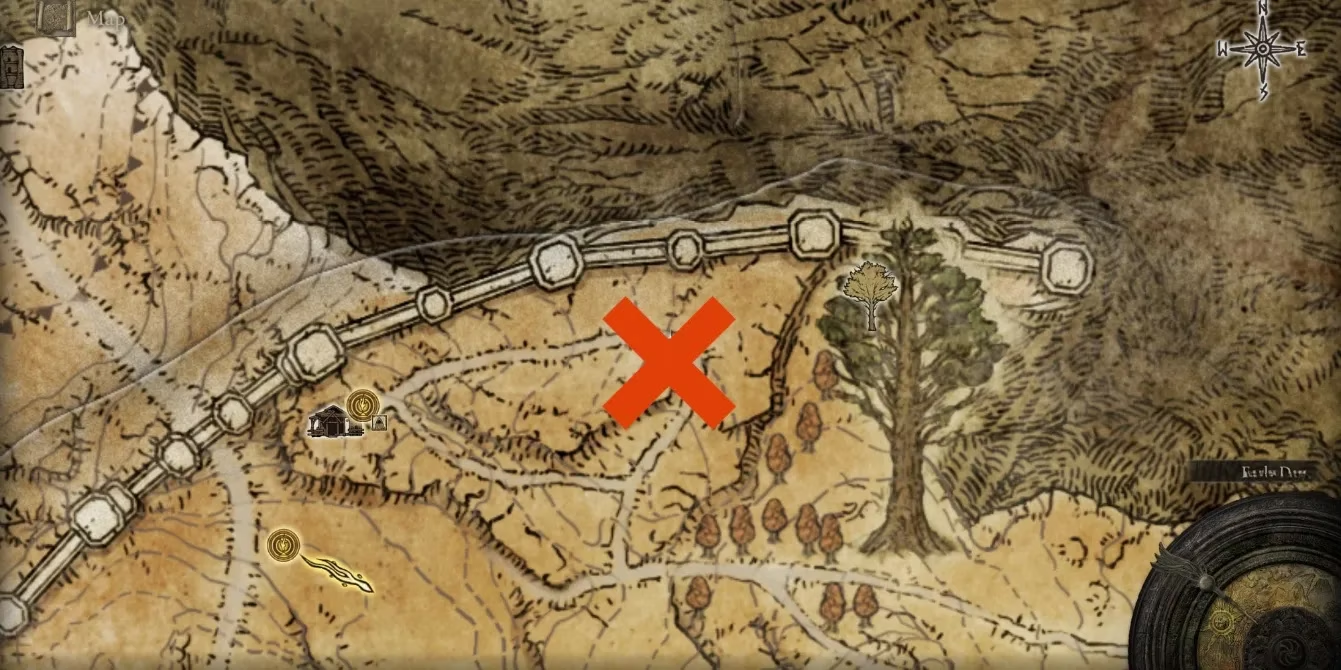
8. Western Mountaintops Death Rite Bird
Southeast of the Apostate Derelict. This is arguably the toughest in the base game.

-
The Cheesier, The Better: These things are immune to almost all statuses... except Scarlet Rot. Apply Rot (via spells, arrows, or the Antspur Rapier), then run and hide. Let the rot do the work! You can even find a safe spot to de-aggro it.
-
Reward: Explosive Ghostflame Incantation. A huge, devastating AoE explosion. Fantastic for faith/intelligence builds.
🌿 The DLC Challenger: Charo's Hidden Grave
With the Shadow of the Erdtree expansion, a new Death Rite Bird was added, and finding it is half the battle!
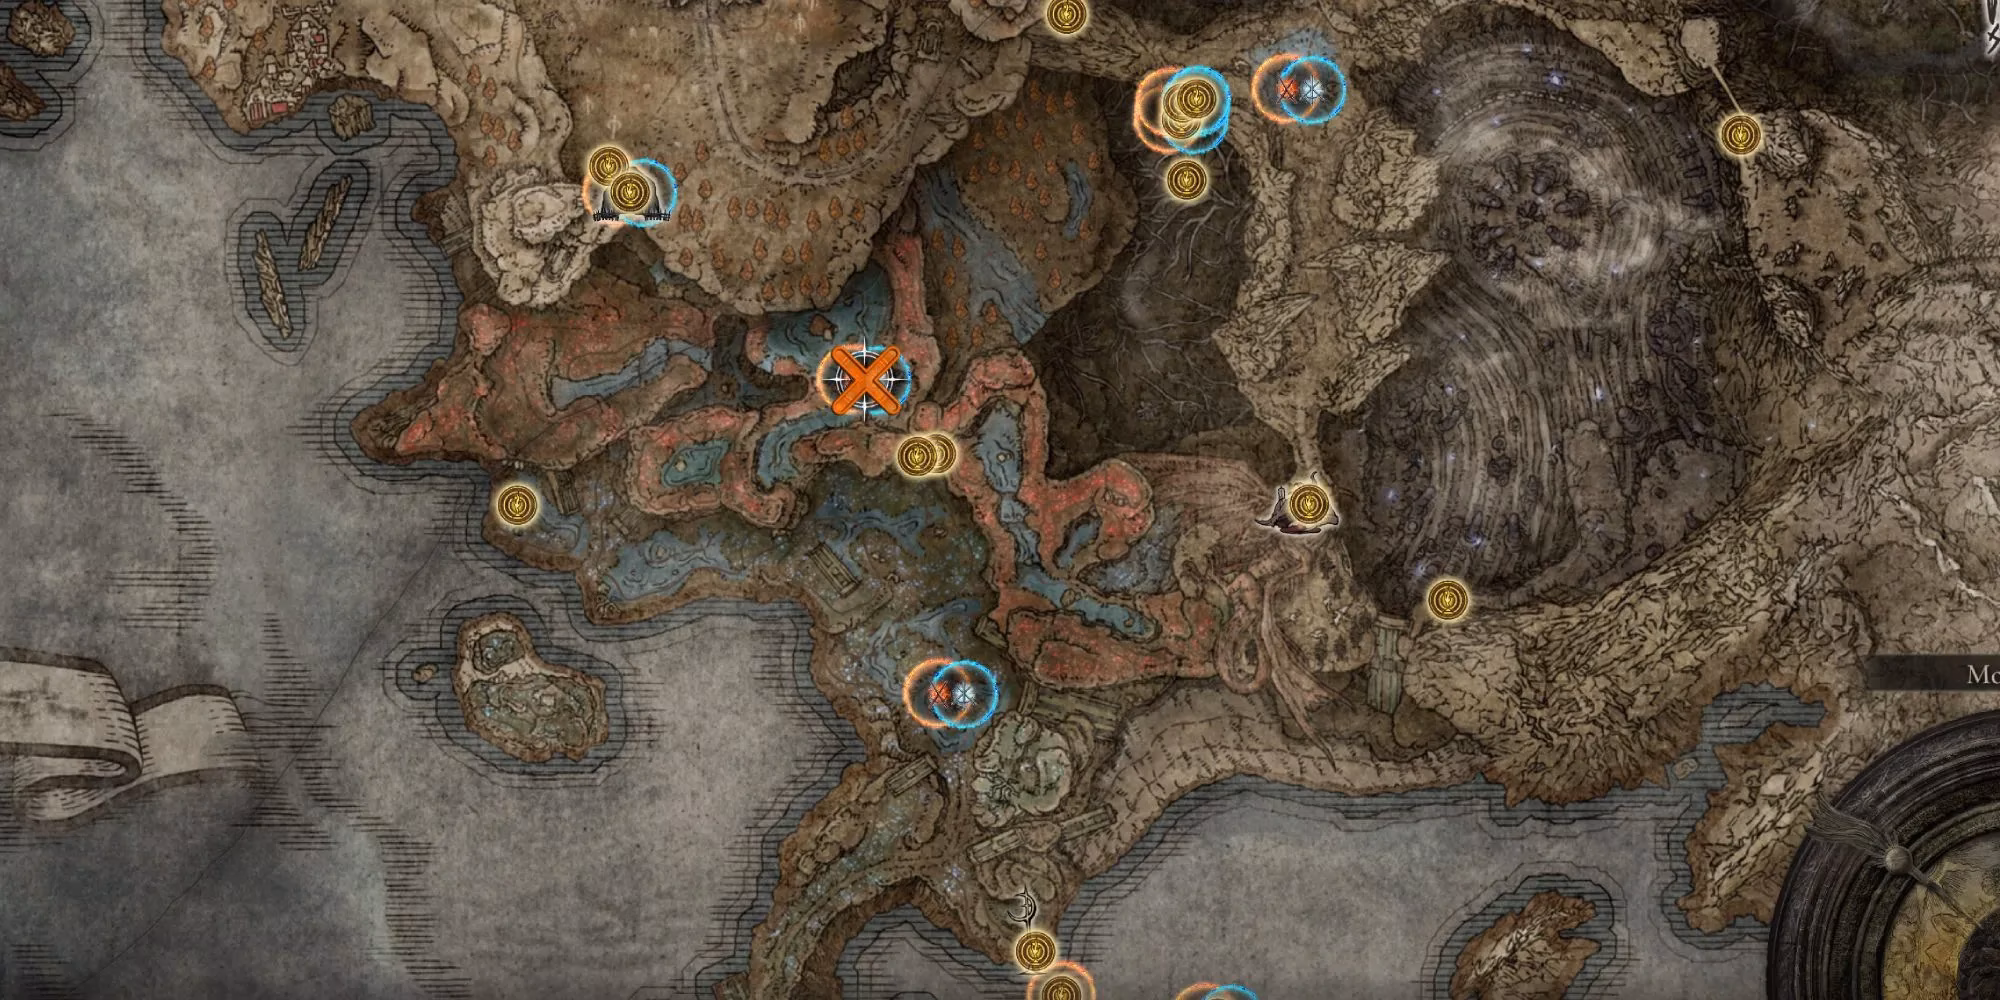
9. Charo's Hidden Grave Death Rite Bird
This one is tucked away in a secret area. You need to find the way to Access Charo's Hidden Grave. Once you're at the Site of Grace, head into the waterlogged graveyard and go to the far end. It'll spawn right there.
-
The Fight: By now, you're a veteran. Use everything you've learned. Its moveset is familiar, but don't get cocky. Stick to the golden rule: HOLY DAMAGE. Spam those pots and incantations.
-
The Reward: Defeating it grants a hefty sum of runes and continues the tradition of dropping powerful death-themed gear, making the trek to find it totally worthwhile for completionists.
🛡️ Final Checklist & Tips for 2026:
-
#1 Rule: FIGHT AT NIGHT. They simply won't appear during the day. Pass time at a Site of Grace.
-
Best Damage Type: HOLY. Always. Weapons, buffs, pots—prioritize these.
-
Status Effect: Only Scarlet Rot works on Death Rite Birds. Use it as a backup plan.
-
On Horseback? Risky. The loss of i-frames from rolling is a huge downside against their speed and AoEs. I recommend fighting on foot for better control.
-
General Strategy: Stay close to their legs/body, dodge into swipes, and run away from the obvious big AoE slams and fire attacks.
Hunting all these birds is a rite of passage in Elden Ring. It's challenging, spooky, and incredibly rewarding. Good luck out there, and may the grace of the Erdtree guide you (and your holy pots)! ✨